goddi
-
Posts
3,578 -
Joined
-
Last visited
-
Days Won
25
Everything posted by goddi
-
Auto-detect scanned slides' black borders & crop them
goddi replied to goddi's topic in Equipment & Software
Barry... I guess it nice to have both possibilities in the same Action. Just need to check/uncheck the box. But good to know. Gary -
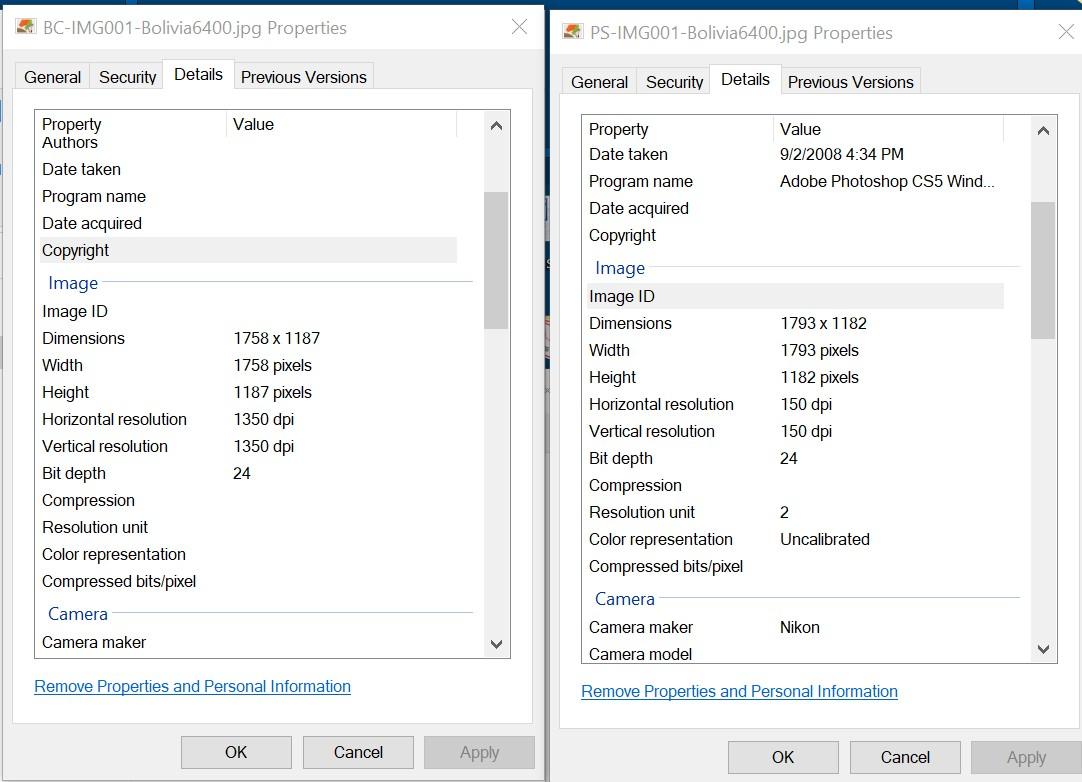
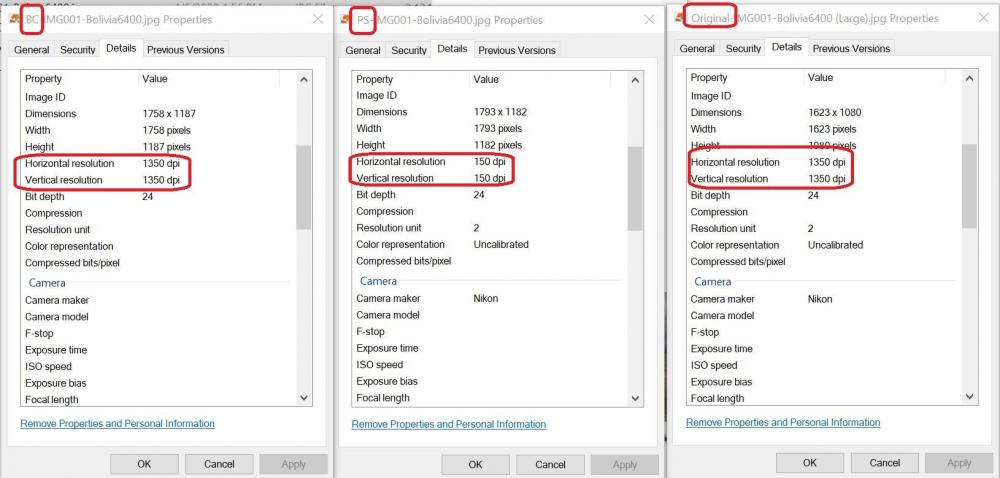
Lin, Just wondering why PS would change the DPI, anyway. I don't think I made any such choice in the Action I had created. I'll have to take a look. So the difference in the color (and maybe sharpness) just had to do with the cropping process. To me, the crop done by PS seemed better for color/sharpness. I can't see much difference in the two images in my posting above, but I can see the difference on my monitor when I open them up side-by-side. No big deal at this point side I can use the PS Action in batch to process all the crops. Gary
-
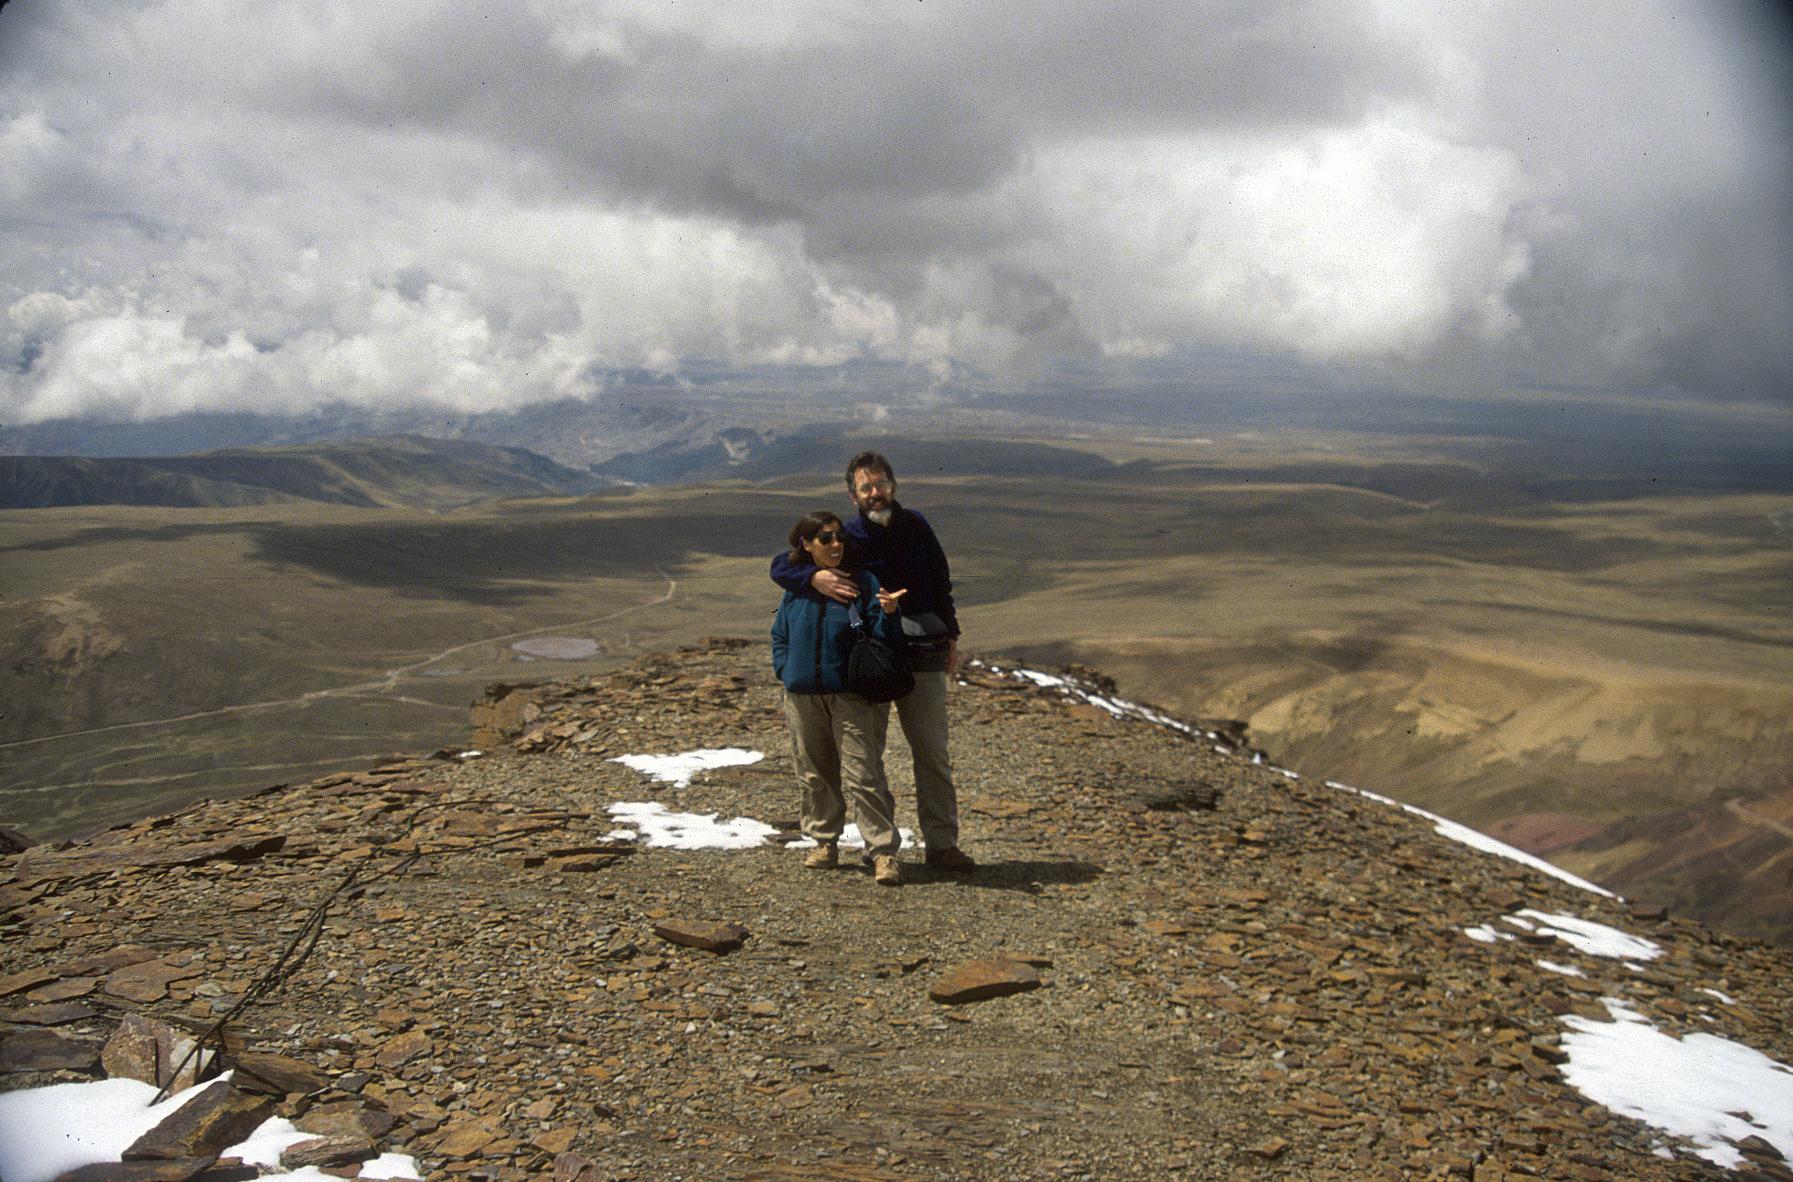
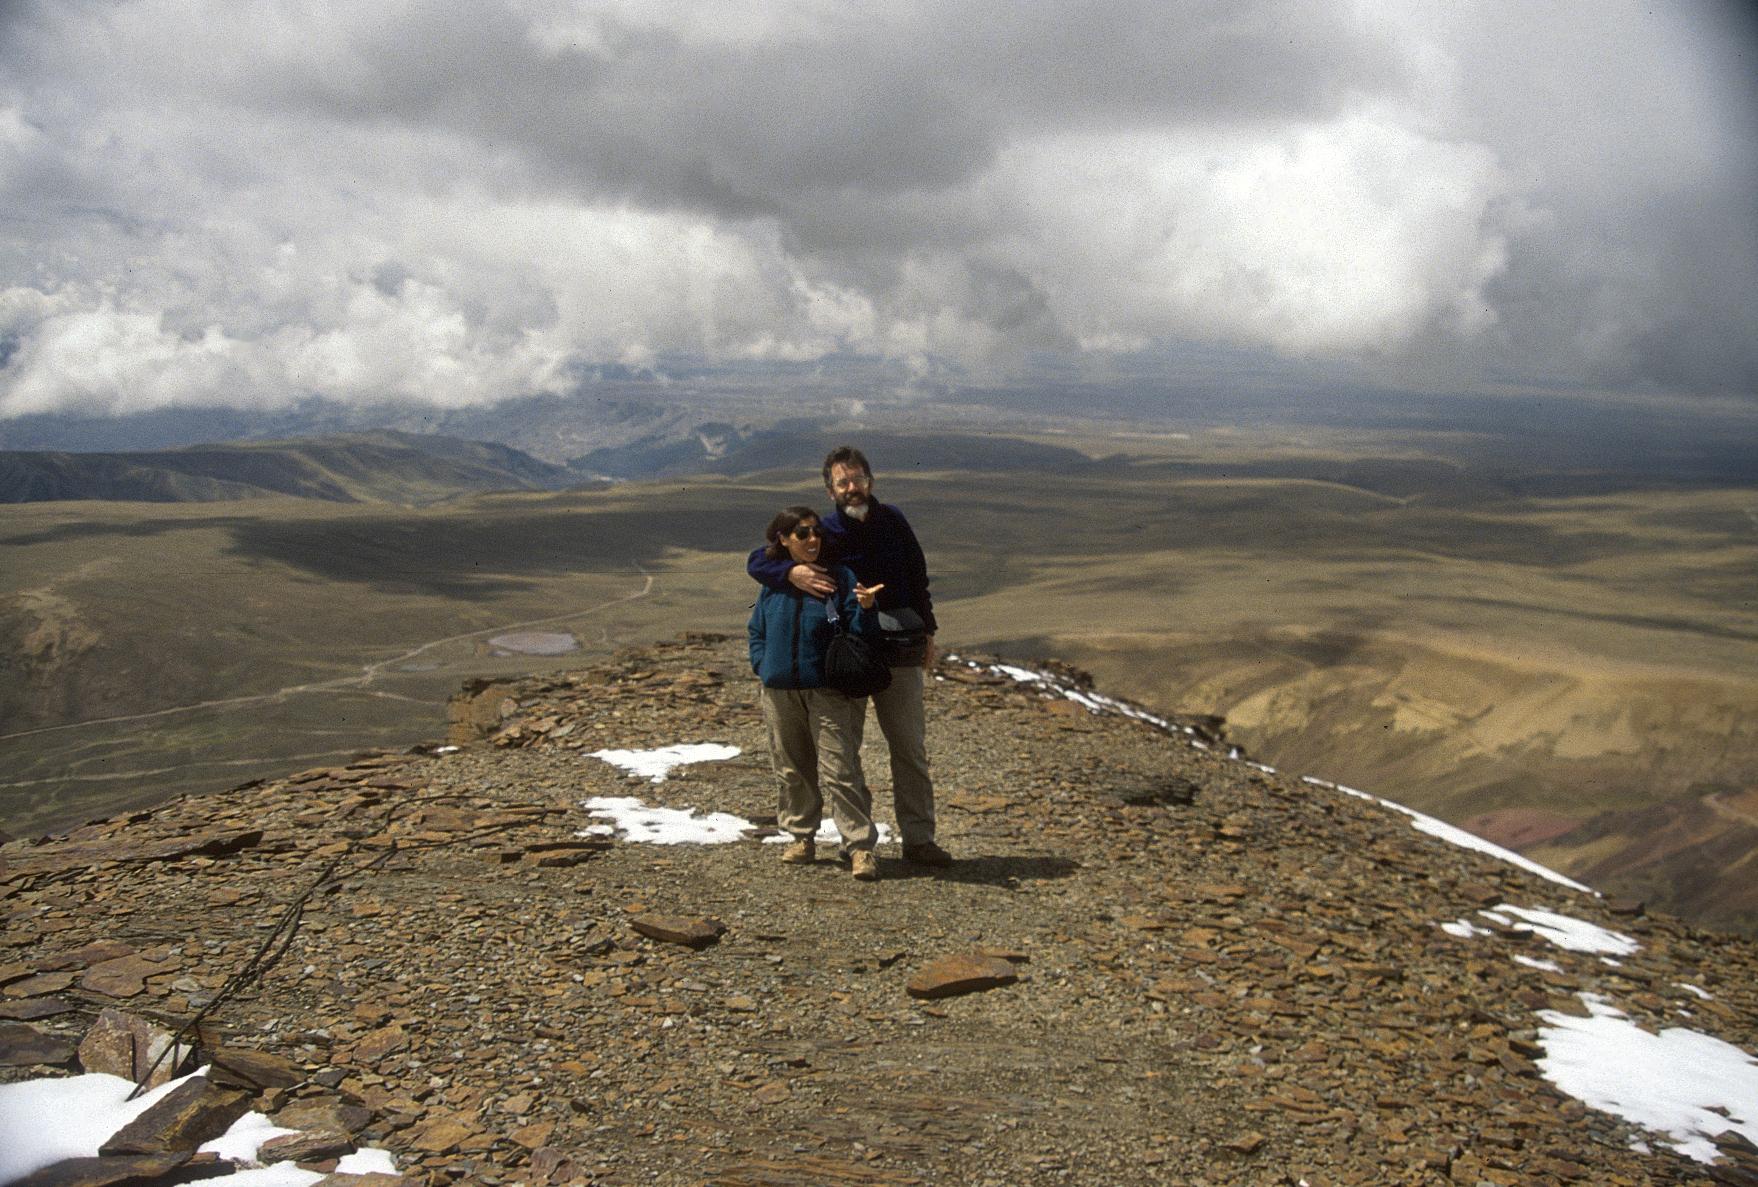
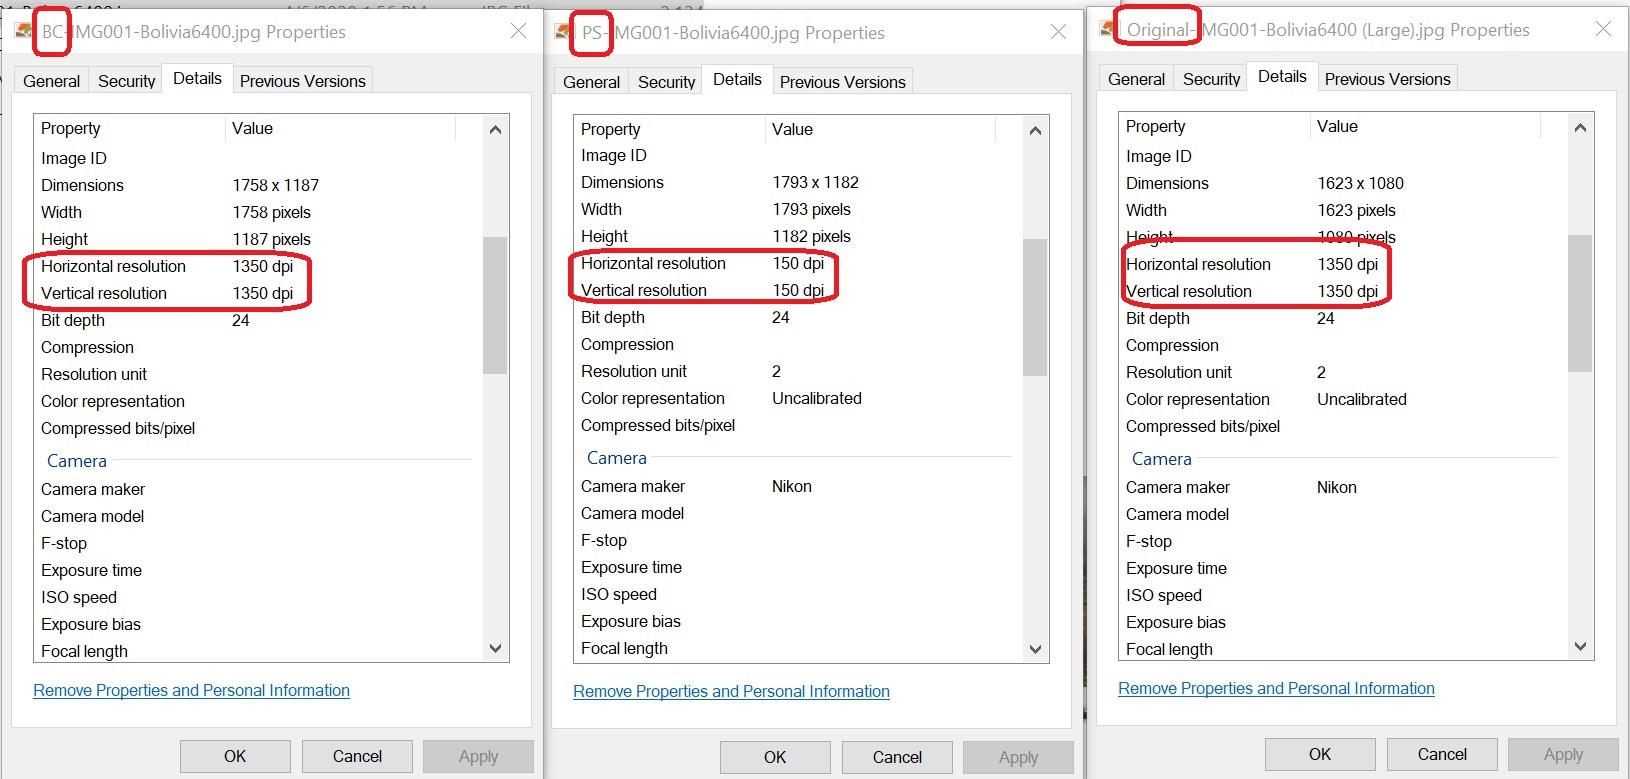
Greetings, I cropped an image (from digitizing a slide) using Photoshop and another program called BatchCrop. Both came out with just about the same dimensions. However, the dpi came out differently. The Photoshop file (PS...) shows 150 dpi. The BatchCrop file (BC...) shows 1350 dpi. But, the Photoshop image looks better at 150 dpi than the BatchCrop image at 1350 dpi. Why would the lower dpi look better (to me) than the higher dpi image? The colors of the 'BC...' image seem to be muted a bit. The original scanned image also is 1350 dpi (ran out of room to attach) but it looks (the colors) very similar to the 'PS...' image that is 150 dpi. Does the dpi have anything to do with what I 'see'. Gary


-
Auto-detect scanned slides' black borders & crop them
goddi replied to goddi's topic in Equipment & Software
Barry, I finally got back to learning how to run my cropping Action as a Batch. But I did it a bit differently. If I use your suggestion of 'File>Scripts>Image Processor' method, the action does save the cropped image in the appropriate folder, but it also saves the original non-cropped image to my Desktop. Perhaps that is just the way I created my Action. Not sure how to remove that step. But I also tried the File>Automate>Batch process. I like this better because it has the 'Override Action "Save As" Commands', which apparently will not save the original non-cropped image to my desktop. Both methods seem to do the same thing, but it is nice to have the ability to be able to check the 'Override...' I guess I could re-write the Action to avoid this step but it is nice to have learned both methods. Not sure what the difference is except for being able to do the 'Override...'. Your method, I see, also allows you to choose the 'Quality', which can be useful in other situations. Thanks for the help. The batch cropping in PS will really help. Some will need the cropping to be fixed but that will be much easier to deal with. Gary -
Auto-detect scanned slides' black borders & crop them
goddi replied to goddi's topic in Equipment & Software
Thanks, Barry. I will give it a try. It will be a while until I decide when/if to rent the digitizer. I'll get on to learning how to do the batch action in PS. I noticed that the program I mentioned seems to reduce the resolution of the images it crops. PS action did not. Have to study it more. https://services.ezphotoscan.com/home/ Thanks... Gary -
Auto-detect scanned slides' black borders & crop them
goddi replied to goddi's topic in Equipment & Software
Barry, Yes, thanks for the suggestion. I just made one action for horizontal images and one for vertical images. They work. However, if I digitize all of my slides, I will have 7,000 or 8,000 or more images. I haven't figure out yet how to do it as an action batch. I'll look into that. Yes, I could sort them by 'Dimensions' and apply the 'horizontal corp action' to the horizontal images and 'vertical crop action' to the vertical images. I'll see if I can figure that out. However, I would like to find, if possible, a program that will automatically detect the proper crop, whether horizontal or vertical. I have found one called BatchCrop. https://www.batchcrop.com/download.php?a=dwin Its auto-detect seems to still need some tweaking. But I haven't figured out how to use this program as a batch function yet. Anyway, I was wondering if anyone has found something that auto detects and crops in an easier way and have been successful with it. I have sent a lot of time searching for something like that but nothing yet. Thanks... Gary -
Tom, I can't take any credit for the animated slide style. I got it from Morasoft a long time ago. I fiddled with it a bit, changed the music and added the video at the end. There is no way I am smart enough to come up with such a cool slide style. Yes, it's a jungle out there. Currently, I'm trying to medicate (with ivermectin) a neighborhood fox that just got the mange. Hiding the meds in hotdogs. Oh...it's 'Colombia', not 'Columbia'. Thanks for watching the videos. Gary
-
Greetings, I am thinking of renting a slide scanner that can scan slides from a Kodak carousel. I'll have thousands of images. But, the scanned images will all have the black borders around them. I have been searching everywhere on the net to see if I can find a program that will auto-detect the black borders and crop them out. I have not found any program that will do it to images that have already been scanned,. Has anyone found such a program. I'd hate to have to crop them one-by-one. Gary
-
Greetings, Well, since we are sitting around waiting for something to do, I figured you could have some time to watch a few of my recent PTE projects. I have discovered that posting them on my YouTube channel makes it easy to just paste a link to them. Anyway, here are some to while away your time.... Gary My Backyard Wildlife: https://www.youtube.com/watch?v=u-kAv8qmqlA Fox vs. Hot Dogs: https://www.youtube.com/watch?v=aaKjk5w2gOY Manantiales, Colombia: https://www.youtube.com/watch?v=Mz5BGcV8B2o&t=7s
-
Igor, After closing and re-opening the files a bit later, the Error notation disappeared and all is back to normal. I've never seen this happen before. But I just had a thought. When I opened the PTE shows, I was also in the process of using Handbrake to encode a .TS file to MP4. My CPU was up to about 98%. Perhaps this had something to do with the generation of the waveforms with the Error notation. Seems to be back too normal and was only temporary. Thanks for the quick reply. Gary
-
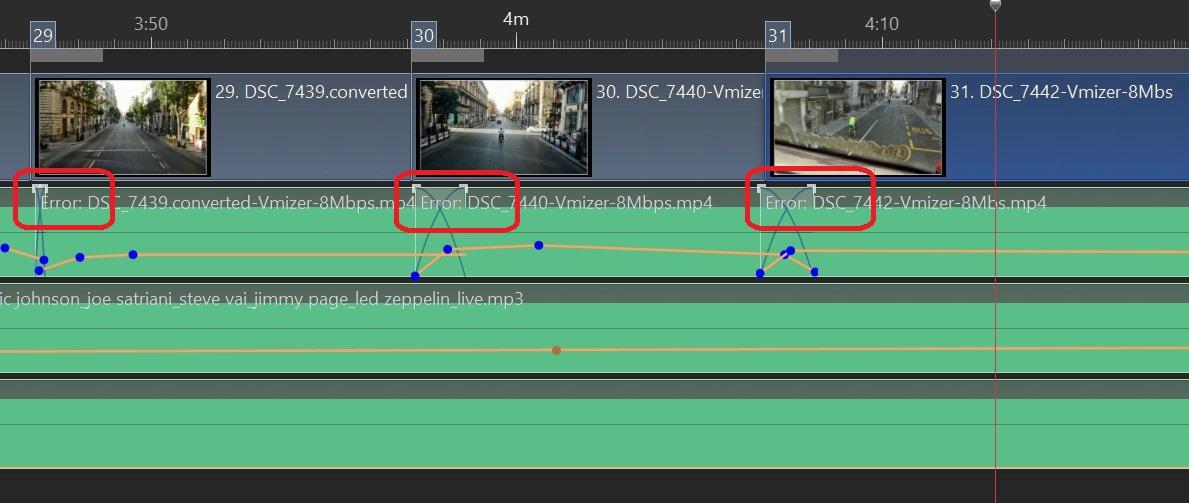
Greetings, I happened to open a project that I had created a few years ago. In the Timeline, I notice there were 'Error' notations added to the beginning of almost all of my added music files. I had several versions of the same show and all of them had these 'Error' notations in the music files shown in the Timeline. Just before finishing this post, I double checked and took a look at the same projects and then the Error notations were not there anymore. The music in these projects played just find with and without these Error notations. Can someone explain what caused these Error notations to be added to my music titles in the Timeline, and then disappear? Here is an example: Gary

-
Greetings, Here is the same site for Barry's videos but just in a different format, maybe easier to find the subjects you are looking for. It will keep you busy. https://www.youtube.com/channel/UCSRlEl6raTzjc6ju4VvucJA/videos
-
Greetings Igor, I think I found what the problem is that is causing the audio to be unsynced. The original hour long video that I had converted from the Tivo format to MP4 showed a glitch at about the 10 minute mark. The audio was in sync up to that point. After that point the audio became unsynced. So perhaps, during my conversion from Tivo format to MP4, the glitch occurred...and not in PTE. I did not notice this because I had viewed only the first few minutes of the video where the audio was OK, and assumed there was not problem with the rest of the video clip. So, sorry for posting this audio problem. It seems to have been caused by either my conversion from Tivo to MP4 or in the recording of the original broadcast. But I was able to separate the audio and move it slightly to match it up where it should have been. Thanks.... Gary PS I just went back and played the original Tivo video and it did not have the glitch. Audio was all in sync. So the glitch that caused the audio to become unsynced was caused during the conversion from Tivo format to MP4 using the Brorosoft Video Converter program. I'll have to keep my eye on that process, but I've used it many times without such a problem.... Thanks for solving the other problem with Trim. Gary
-
Igor, I think I now understand our request. I put the entire video clip in the Slide List and used 'Adjust Time Range" to play only a short portion of the video. I did this and, yes, the audio becomes unsynced. Is this what you wanted me to try? Gary
-
Greetings Igor, I did a Trim, twice, of another different video that I had converted from a Tivo video to MP4 and it did not have the sync problem. I'll do more testing. I am not sure I understand your first request..."reproduce audio sync problem in PTE by virtual trimming same video clip in video object?". Gary
-
Greetings Igor, The good news is the Trim process is working as it should. However, the audio is still not in sync. In four tests with the new version, only one time did the audio stay in sync. The other three times, the audio was not in sync. Here is a short sample. Gary 1.00«-+»x Jimmy Kimmel Live.converted (4).mp4
-
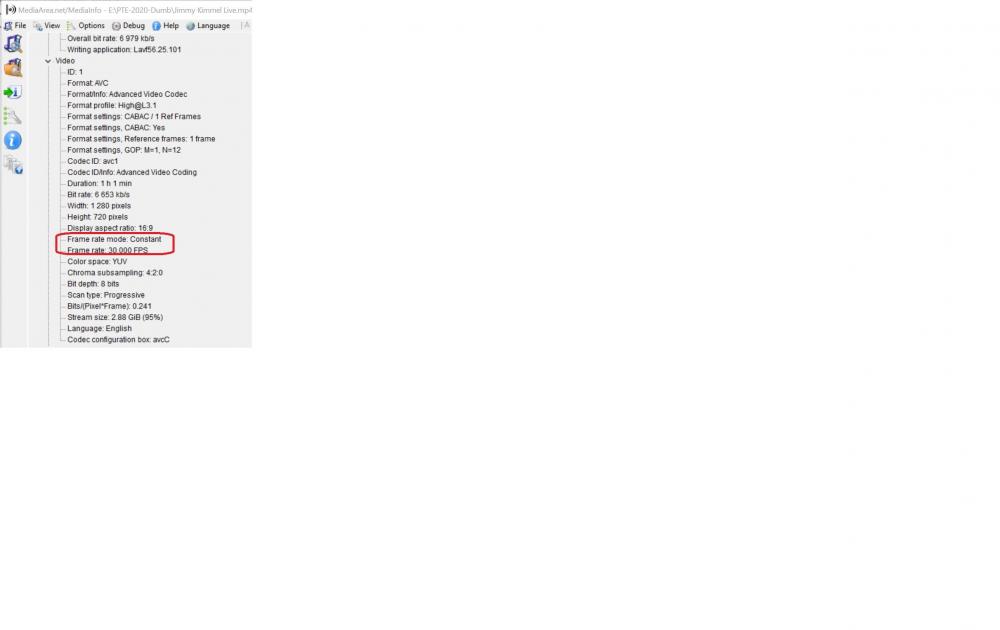
Greetings Tom, I took a look and it shows a Constant Frame Rate Gary
-
Great! I was wondering if I was doing something wrong... Gary
-
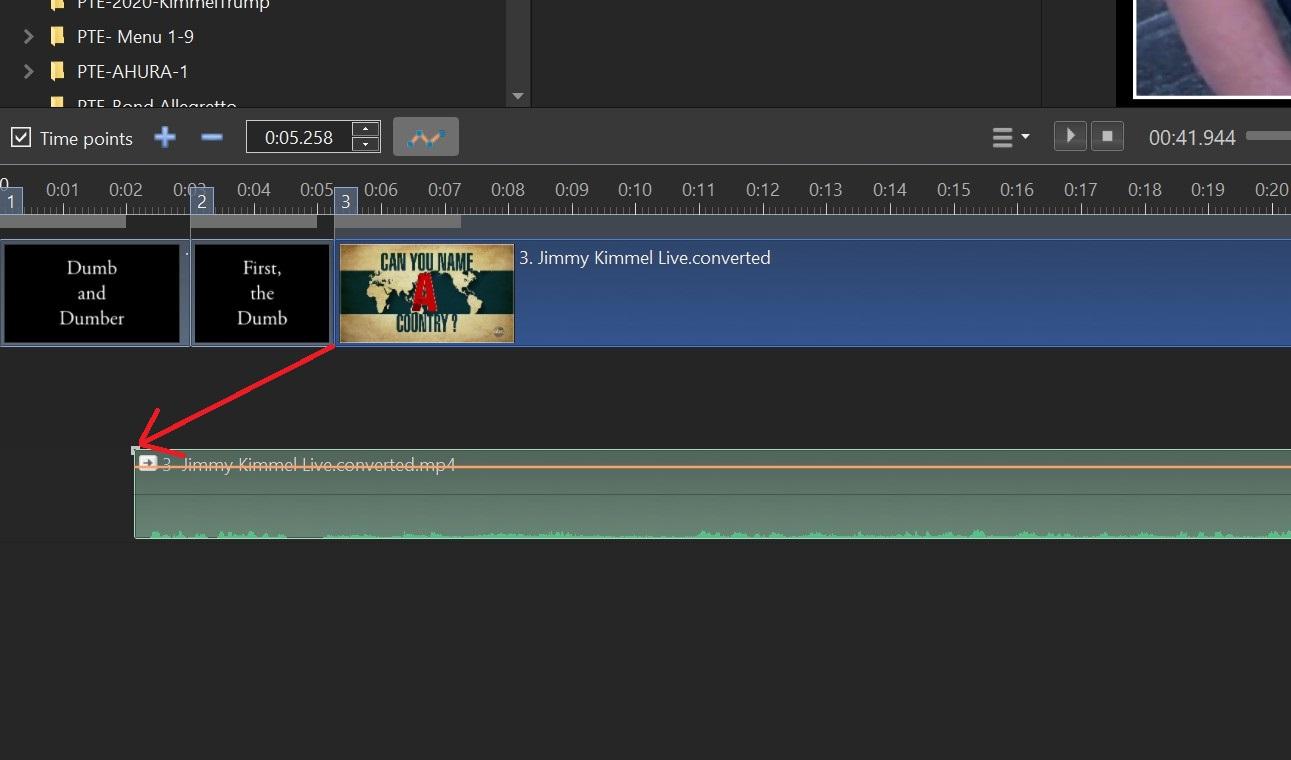
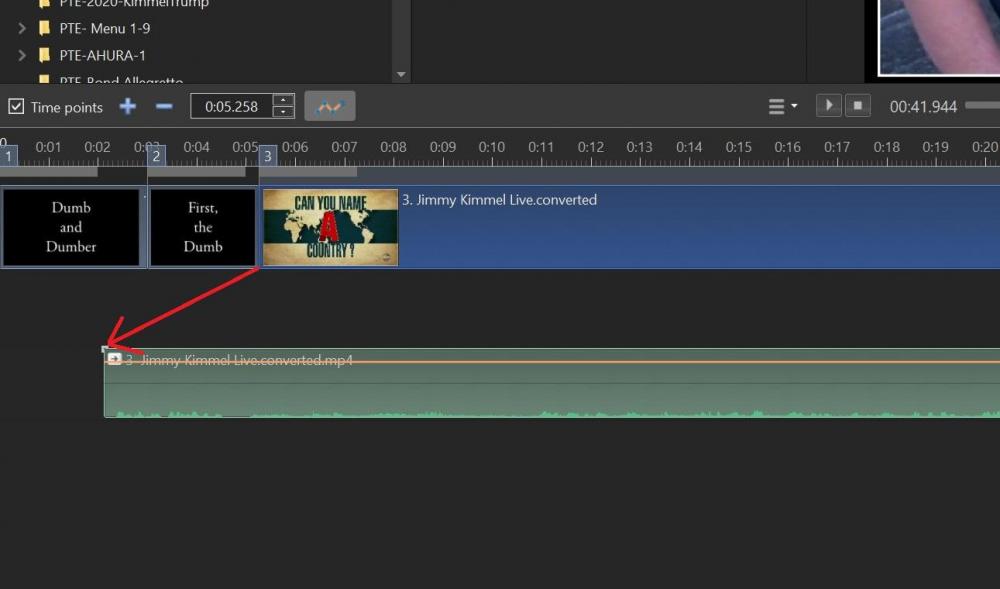
Just to add to the problem with this process, here is a screenshot of how I had to move the audio to the left to sync with the video. This was the only time I could get the Convert/Trim to actually Trim out the section I wanted for the show. Gary
-
Dave, The original video was from a TV show on my Tivo recorder. The original video was in Tivo format, which I then used Brorsoft Video Converter to convert the Tivo format to MP4. Then I tried to Convert/Trim a section of that MP4 file, but the Convert/Trim starts from the beginning of the video, and does not Trim the selected section. I have done this before with similar Tivo video files with no problems. Also, one of the attempts to Trim the video clip worked. But the audio was out of sync. I just separated the audio and moved it to match the video. So maybe there is another problem. Gary
-
Greetings Igor, I took a screen video of the problem. You will see that I tried to do a Convert/Trim of a short section in the middle of the video. When I then tried to do the Convert/Trim of that selected section, the process started at the beginning of the video, not at the short section. (The original video clip is over 3 Gbs so probably too big to send.) https://send.firefox.com/download/84db129b4a997fcb/#4Qs8Bob4tk965vceaa3y2Q Gary
-
Tom... I have been able to Convert/Trim this video clip at least once, but most times it just converts the entire clip, not just the Trimmed section. Not sure if there is a particular setting that is making it do this. I'll have to experiment more. But it is repeatable. At least with this particular video clip. Gary
-
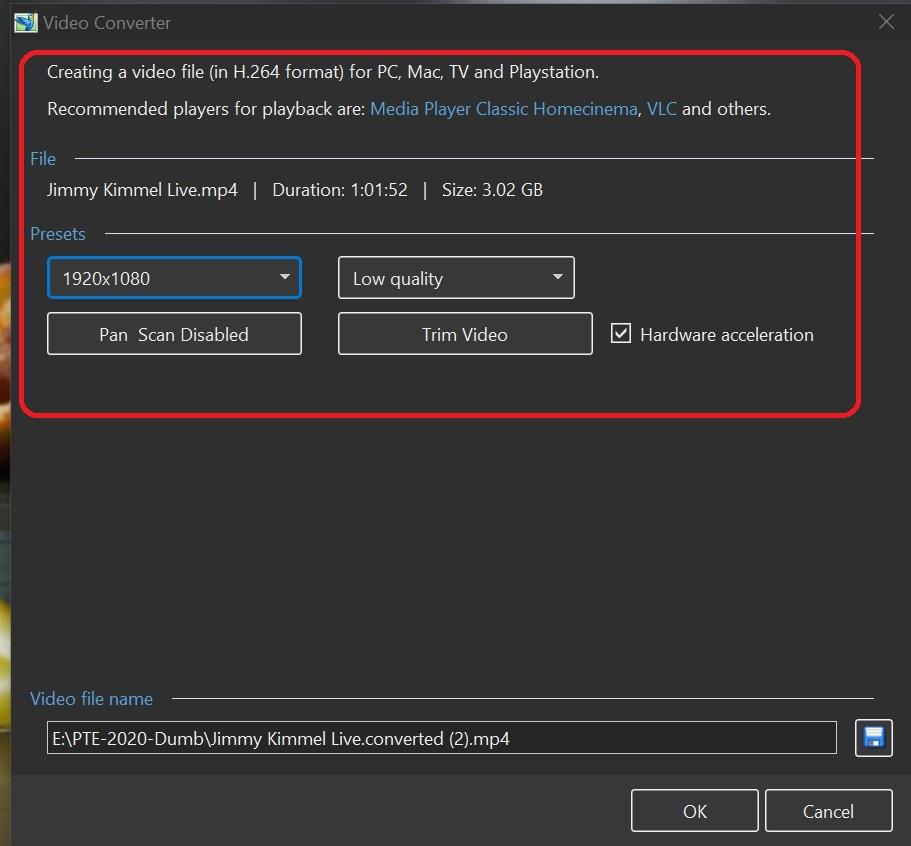
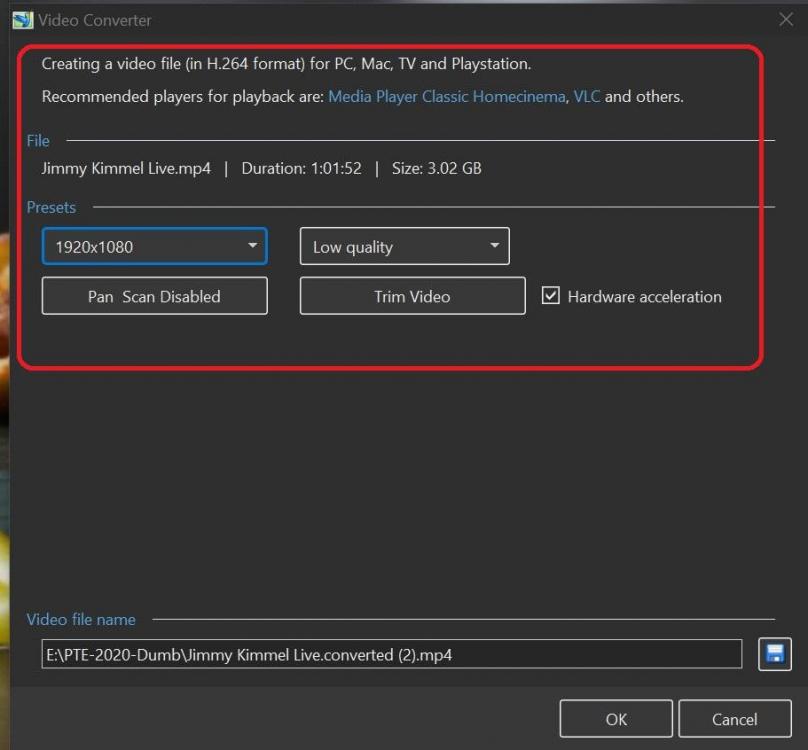
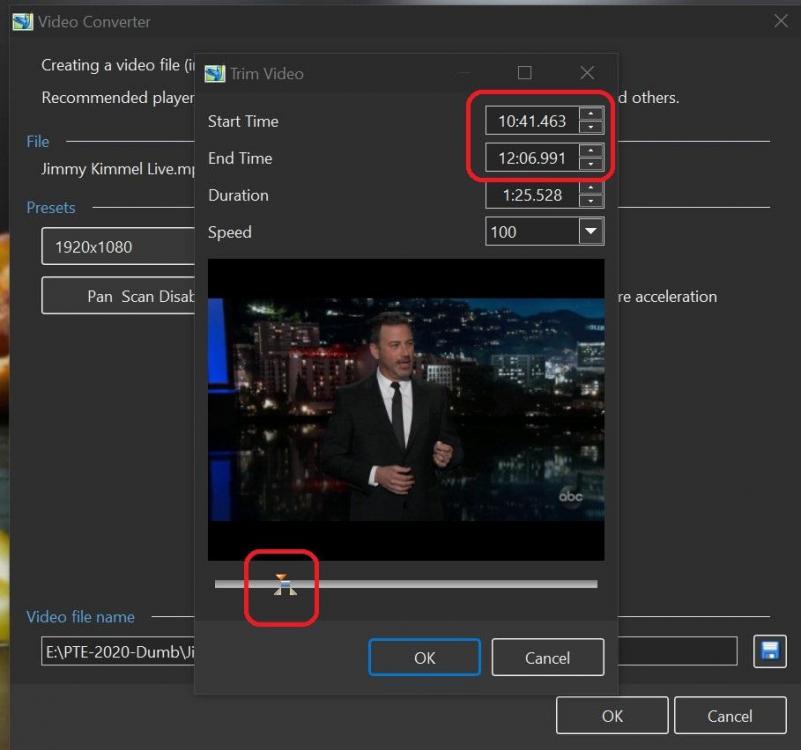
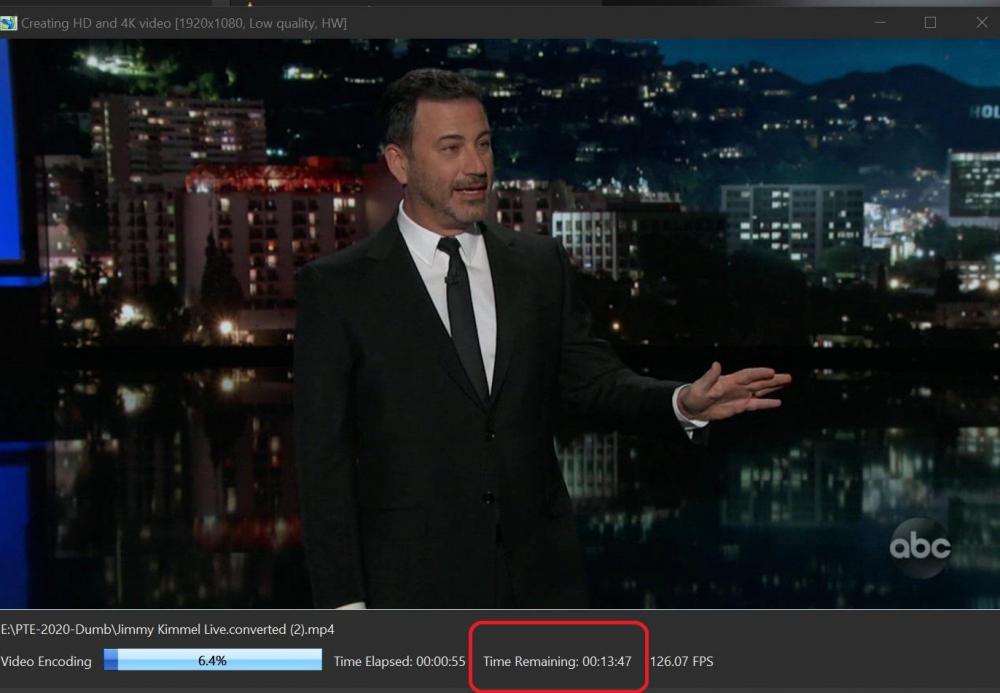
Greetings Igor, I just tried it again and the problem occurred again. I took some screen shots to show you what I did. Here are the settings: Here is the short section of the video that I want to Convert/Trim: Here is a screenshot of the Convert/Trim converting the entire video clip. It is not Converting/Trimming the small selected portion I had chosen in Trim. It is just converting the entire clip from the beginning: Gary =========================================
-
After several tries of it not working correctly, this morning it is working as it should. I don't think I've don anything differently, but Trim is working now. Gary
-
Greetings, Haven't had a problem with Trim before but now, I can't get Trim to work. Every time I make a selection in the video clip, it Converts/Trims the entire video from the beginning. Is anyone else having this problem? Ver 10.0.7 Build 2. Gary