goddi
-
Posts
3,578 -
Joined
-
Last visited
-
Days Won
25
Everything posted by goddi
-
Greetings, Is this only for viewing PROfotoRGB images? I opened some sRGB images and, when looked at full screen, the colors looked similar between the two windows. However, when looking closer at the images (sRGB) at full screen, the image on the right (Color Management) seems to be a just a little less sharp or a bit softer than the one on the left (No Color Management). I don't know if this is just a mental thing or my monitor, but there does seem to be a slight difference in the sharpness. Any others see this???? Gary
-
=================== Dave, I was just wondering why I had not been receiving any notifications of new shows from the new site. Thanks for pointing to the fix. I found 'Follow This Category' and now I can expect the notifications. Thanks... Gary
-
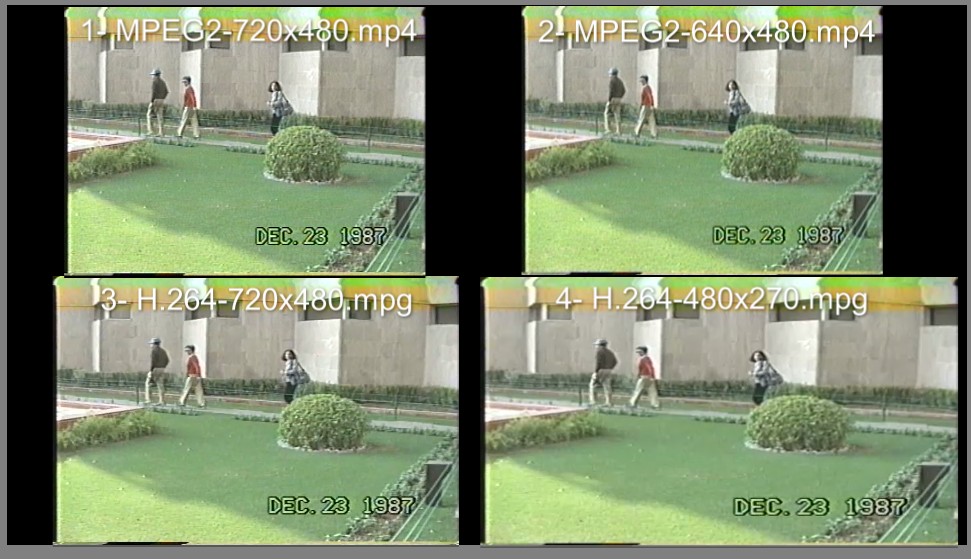
Greetings, I exported a small Hi8 video clip 4 times using the 'Roxio Easy VHS to DVD 3 Plus' device. Each export was exported in a different format it offers. I brought each image into PTE (each Zoomed at 50% to make all 4 to fit on one screen). It looks like the Clip #1 (MPEG2-720x480.mp4) is the better result. But I don't understand why Clip #1 and Clip #3 do not show up in PTE at the same size when they are both 720x480. Does an export as MPEG2 (mp4) give a different result size than H.264 (mpg)? It strange that the Clip#1's 720x480 (1.5) looks better than Clip#2's 640x480 (1.33), since Hi8 is 4:3 (1.33). Is it just my eyes??? But they appear the same size in the attachment. Gary

-
====================== Greetings Eric, Both are analog. I've converted VHS tapes with this Roxio device and now I want to do it with my Hi8 tapes. Same process, same connections to the PC. I am just wanting now to be sure I am selecting the best settings. As a test, I converted a section of a Hi8 tape using the H.264 compression and using the MPEG2 compression. I put them both in PTE, side by side. It seems the H.264 is a bit less blurry. To get them side by side in PTE, I set the Zoom for the MPEG2 at 50% and the H.264 at 45%, to get them the same presentation size. So, if I use the H.264 (seemingly less blurry), then I get several Frame Rates to choose from. In my test, I used 'NTSC (29.97)'. But I am wondering what the effect would be if I used 24fps, or 30fps, instead. I could run a bunch of more tests, but it comes down to what will work best when put into the PTE and then 'converted'. My eyeballs are not calibrated too well so I am wondering from a technical point of view, which selection of settings should be better. And, if I use H.263, the available Resolutions (480x270 and 720x480) are not 4:3, as I think the Hi8 tapes are. Won't I be 'stretching' the image? It is just hard to tell which is right. Gary
-
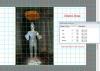
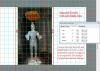
Greetings, I recently purchased the 'Roxio Easy VHS to DVD 3 Plus' device to digitize a bunch of tapes. I have a lot of old Hi8 tapes that I want to convert to be able to put them in PTE shows. I am a bit confused as to the better settings to select. I know I can discard the PAL choices, since I am in North America. I have attached two screenshots of the possible choices. The choices are the Compression, the Resolution and the Frame Rate. Depending on the Compression that is chosen (H.264 vs MPEG2), you get to choose different Frame Rates and Resolutions. I believe the Hi8 is 4:3 aspect ratio, so I'd think that the proper selection would dictate selecting the Resolution of '640x480' (or does it not matter?), which forces the selection of MPEG2 with the Frame Rate of 29.97. But I wonder if it makes any difference to select H.264 so that I can choose a different Frame Rate, but the Resolutions are not 4:3. Any increase in quality? Which Compression does PTE prefer? So I am a bit confused as to which group of setting will be the best for later insertion of the videos into PTE. Any ideas??? Thanks.... Gary
-
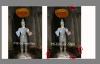
==================== Greetings Dave and jt, I did a test to see if, as you both say, that I would get the same results with PS and with PTE. With PTE, I put in 50px in each setting. With PS, since there are only two settings, I put in -50px in each. In the attached image, you will see that they don't compare exactly. Ok, we should not compare PS with PTE. But the problem is that PTE calls this function 'Canvas' but it really does not do what the Canvas function of an image editor does, such as add a border around the image. So, to be clearer, PTE should not call it 'Canvas'. All that PTE's Canvas tab does is crop the image. It is a useful feature but a bit strange to grasp, at least for me. Now just wait for questions on the Animation tab!!!:)/> Gary
-
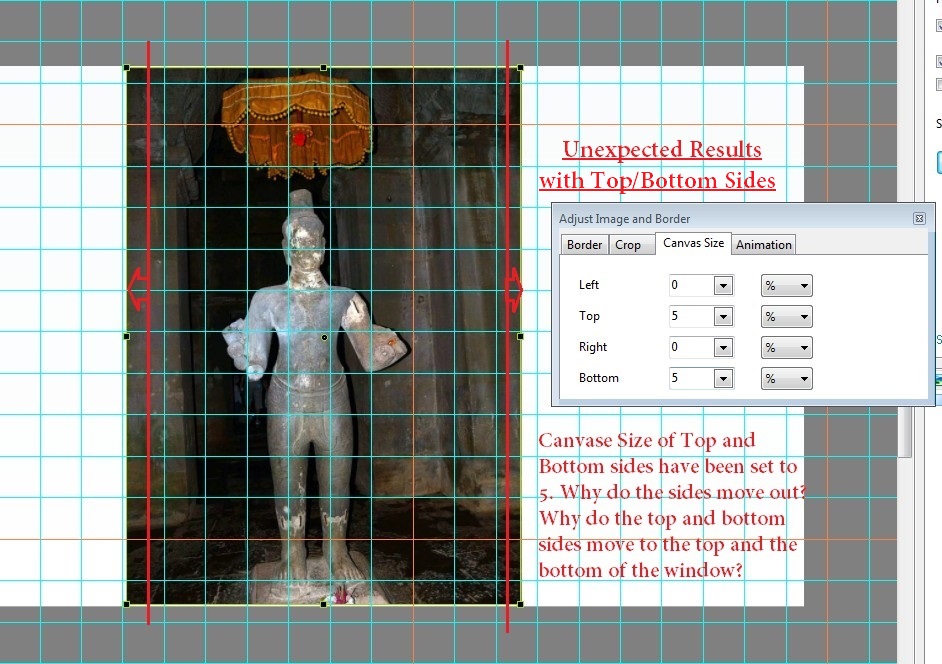
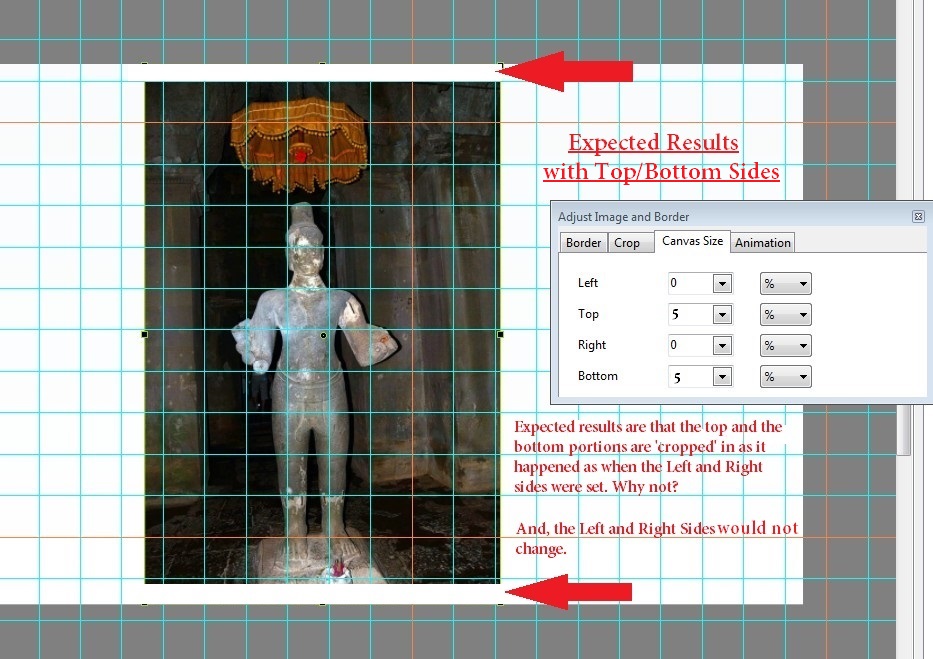
============================================ Greetings Dave, I do exactly what you have described. I see the results. But my point is that the results are not intuitive. I think that since you are what I would call an expert in these matters, use the function and get results. However, I am a mere mortal that would like menus to be intuitive. /> I stick by my guns that the 'Canvas Size' is incorrectly labeled. When in Photoshop, for example, its Canvas adjustment will allow you to put a white (or any color) frame around the image (not changing the image size). The PTE's Canvas Size actually crops the image. Not only that, but the Left/Right setting reduces the image size (or crops it) and the Top/Bottom actually increases the image size. For this tab to be intuitive, it should be renamed something like 'Image Adjustment' and the Top/Bottom setting should not increase the size of the image but decrease it in the same manner as the Left/Right setting. Yes, you are changing the canvas size (and only in a negative direction), and not in the traditional way of its definition. Probably, at this point, we will have to agree to disagree. But it has been another learning adventure. /> We really have some good discussions on this forum but I wish other would add there opinions, too. Added Later: I was just poking around with this function and I noticed a little bit of a strange reaction in the Canvas Size. If each setting is set to zero, and then I start adding to only the Top setting, the image expands to the left and right sides, as mentioned above. But at about '80', it stops expanding left and right, and starts to actually move the Top edge down as I expect it to do from the beginning. Ok...so why does it do that? I get the same response with the Bottom setting. As I mentioned before, the Left/Right edges start to move in immediately. Added even later: I have been testing this strange reaction on different show, images and videos. I am getting different results. On another video, the Top started to move down instantly. On another video, it started to move down much latter than the '80', as shown above. On an image, it expands out and then Top started to move down at about '177'. What can be causing these different reactions? Much thanks... Gary
-
============================ Dave, Here is what I find is the definition of adjusting a Canvas: "When you modify the canvas size of an image, you either increase or decrease the amount of area of the image canvas. This means that adding to the canvas size will add blank area around the image (or fill it with the background color if there is only one layer). Conversely, if you decrease the canvas size, the image will be cropped, meaning you will lose some of the image depending on where you crop it." It seems to be used mostly for adding a background to an image. But it also says it can crop an image. The PTE's Canvas adjustment only crops an image. So this is where there is confusion. The PTE's Canvas adjustment will only crop an image but it is not consistent in the results when you compare the Left/Right and the Top/Bottom results. It crops the image only in a decreasing way, not increasing (adding a blank area). When in Photoshop, it is clear that the main use is to add a frame around the image. Not sure what you mean by 'FIT'. I looked at your Block-64 transition. I looked at it in the Edit mode in one of my shows. But that is way above my head so I don't know how to deal with it or how it relates to my question. The first of your 3 links to the Forum doesn't work. But I don't see how the other discussions relate to my question. It seems to me that the 'Canvas' should really be called 'Crop', and the Top/Bottom setting should be made to work like the Left/Right setting work. You want me to work with a border but that is not part of my question. I am trying to exclude all other inputs and work only with the 'Canvas' settings tab. The 'Canvas' tab just does not make sense to me. Just my 2 cents. Gary
-
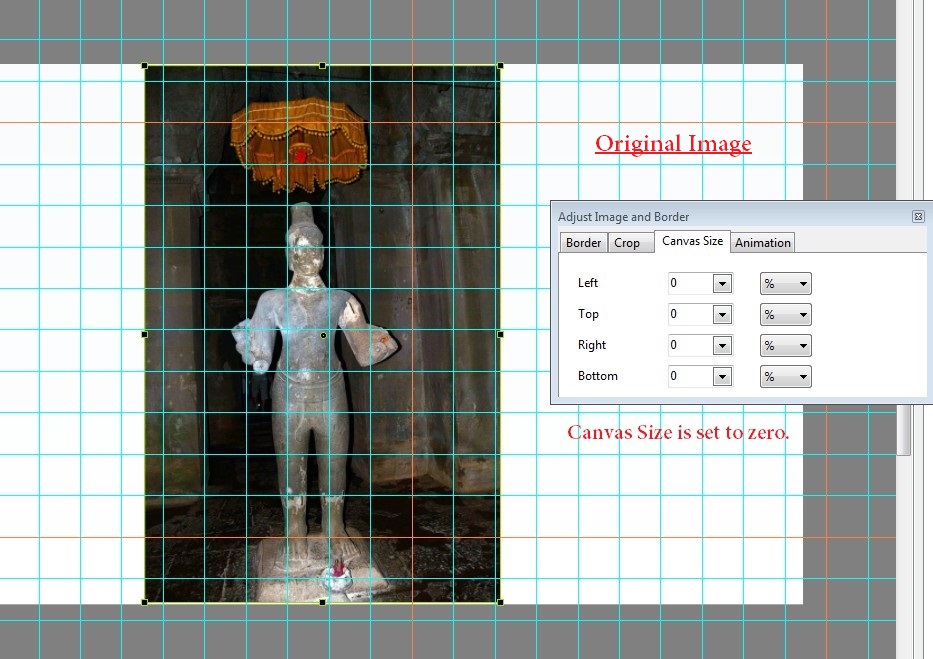
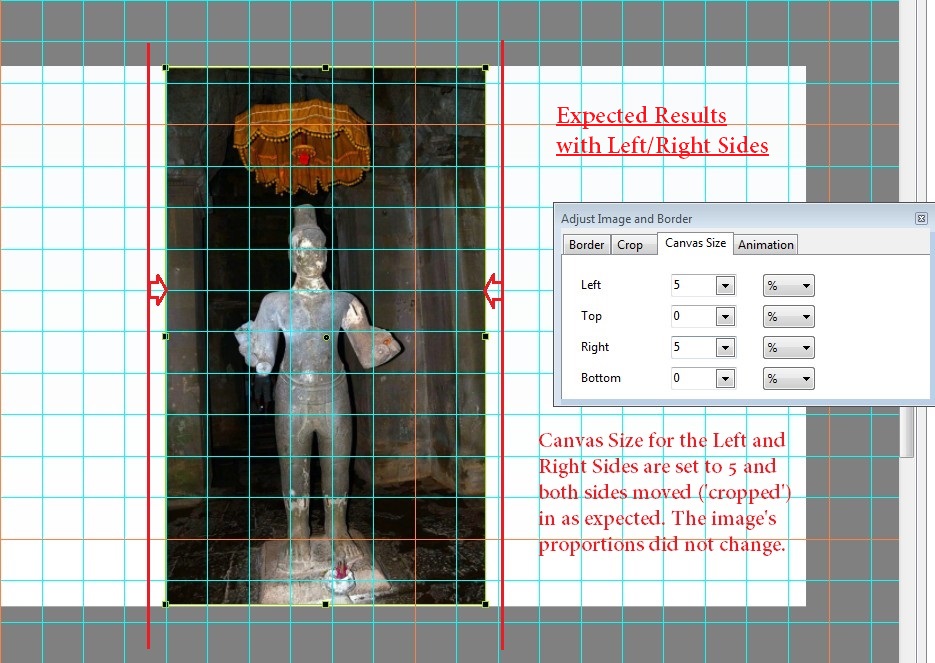
========================== Greetings Dave, I have not used the 'Adjust Image and Border' function much before so I am new to trying to understand it. I am only dealing with the Canvas, not the Border function. First of all, I understand the traditional 'Canvas' function is supposed to add a frame around the image. So to me, the PTE's Canvas function is mislabeled. The 'Border' function actually does this (though I don't like the way it adds the border and, at the same time, reduces the image size). But that is another story that, if I remember right, was discussed some time ago. I have not looked into that yet. So, in my mind, the Canvas function is not really doing the traditional Canvas function of just adding a boarder around an image without changing the image's size. I initially used it to trim (or crop) out the wavy edges of an added video. I only used a small setting so I did not notice how it was slightly altering the video's viewing size. If we can agree that this is not really creating a Canvas (since it only reduces the size of the image), I still do not understand why the Top/Bottom setting is not reacting the same way as the Left/Right setting. If the Left/Right settings brings in (or crops) the left and right sides of the image, then I would expect the Top/Bottom settings to bring in (or crop) the top and the bottom of the image, without changing the image's or video's proportions (such as zooming in as it does with the Top/Bottom settings). I did search the Forum but I could not find any discussion relating to this issue. Gary
-
======================== Greetings Artem, I am not sure I understand your explanation for what I see is an inconsistent result with the Top/Bottom Sides compared with the results with the Left/Right Sides. So I created a new post ("Canvas Size not working as expected") with my question and several screen shots to explain in more detail my question. I'd appreciate if you could view that posting to see if you see what I am trying to explain. Thanks... Gary
-
Greetings, In a response in another posting of mine, Artem recommended that I use the Canvas Size to solve a question I had. It did help in part, but it caused me to question why the Top/Bottom setting did not seem to work in a similar fashion as the Left/Right setting. His response was as follows: "Canvas Size determines which part of original video file is displayed. It doesn't control at which size it is displayed, i.e. canvas size is not the zoom. If your video had 100% zoom before you reduce canvas size, it will remain at 100%. The result might appear as 'zoom in' since fewer pixels are fit in the same size. To avoid that effect, you have to reduce zoom accordingly. You can ask Dave (davegee) for additional information. He knows a lot about this feature, and might give you some practical advice. " I am not sure I understand this explanation. I am posting my question so that, perhaps, it can be explained in more detail. I am attaching several screen shots of what I see as perplexing to me in the way the Top/Bottom setting does not react in a similar way as does the Left/Side setting. What is happening with my results with the Canvas Size seems to contradict Artem's response. So what am I missing? Thanks... Gary
-
========================== Eric, Ok...Thanks for your persistence! I finally found the correct file to download that would install the FFMpeg for Audacity. I installed it and I was able to open an AVI in Audacity. Your folder has a lot more files than mine, but since it worked for me, I am happy. So thanks for the help. :D/> Gary
-
========================= Greetings Artem, I gave it a try. Yes, thanks. What a better solution!!! But...I notice that the 'Top' and 'Bottom' settings seem to react differently from the 'Left' and 'Right' settings. The 'Top' and 'Bottom' settings actually bring in the left and right edges to cover the wavy edges of the video, as expected. However, when I use the 'Top' and 'Bottom' setting, the results seem to 'zoom in' or enlarge the vidieo's size. It does not move in from the bottom or the top to reduce the viewing area as does the 'Left' and 'Right' settings. Can you take a look at this and let me know if this is correct in the way it is working? Thanks... Gary
-
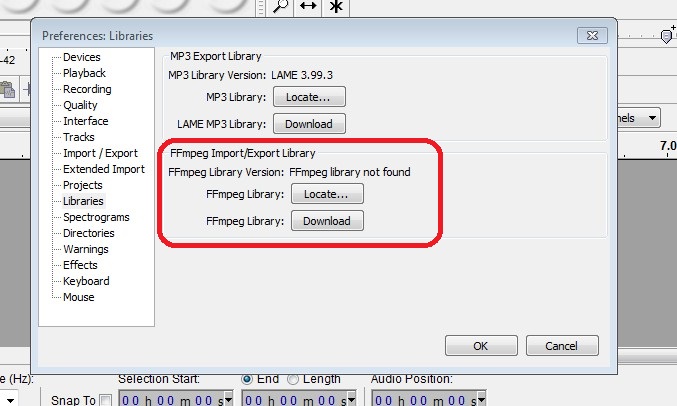
============================ Eric, The 'lame' files are in the Audacity folder. However, I am going to give up with the FFMpeg files. I just can't figure out what is going on here. I will just convert any avi files to audio files using the process in PTE. Just not getting it. Thanks anyway. Gary
-
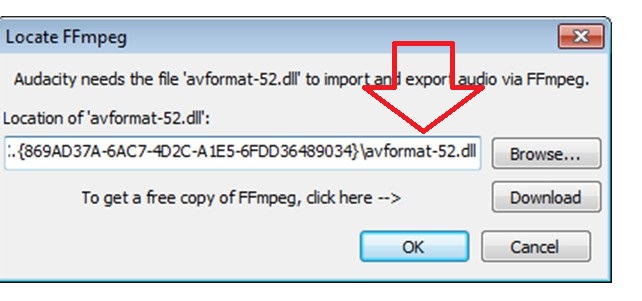
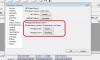
=========================================== Eric, Thanks for the links but I have been there and done what, I think, I should do to get the FFMpeg installed. I am puzzled by the fact that my image #2 (above) indicates that the FFMpeg is not found, but in image #3, it shows that I have the correct file, avformat-52.dll. So I am confused as to what is the problem. When I click on the downloaded FFMpeg exe file, the screen flashes as if something is being installed, but nothing changes. Gary
-
=========================== Peter, Eric, I checked to see if I have FFMpeg, and it seems that I do. But it still will not work. See the attached images. Even though I have the FFMpeg located, it still says the FFmpeg can not be located. Not sure what is going on here. Do you see anything strange??? I do have the Lame and it seems to be OK. Gary
-
========================= Lin, Thanks. I just could not remember those steps. It worked. I also was able to use the 'Link audio clip...' so that the 'new' audio clip from the video would line up with the video clip. Then when I inserted the introductory blank slide, the beginning of the audio clip stayed with the beginning of the video. Super!!! Thanks... Gary
-
=========================== Peter, I think I will stick with my method. I just have to remember to create the rectangles as a 'child'. It just makes it easier to adjust, if needed. But it would be nice to be able to copy/paste a 'non-child' object to be a 'child' and keep its original proportions. Thanks... Gary JT... Thanks for the explanation. I kinda see what's going on now....Gary
-
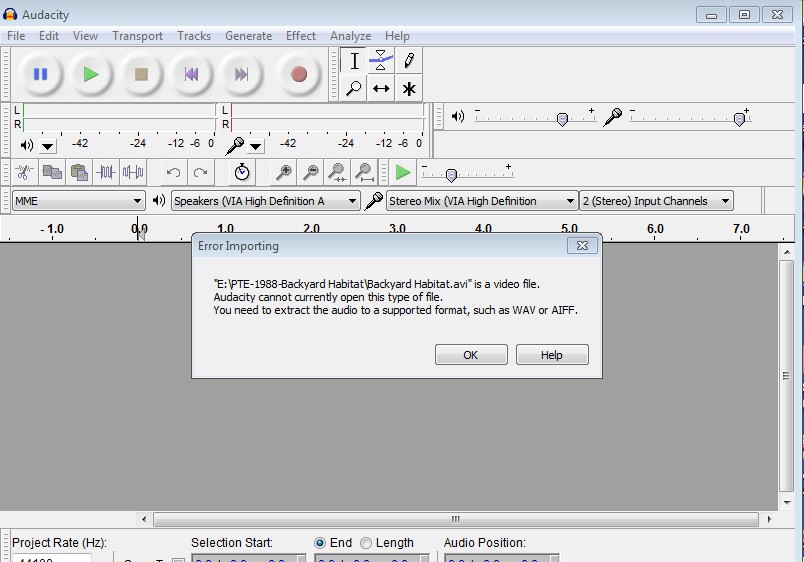
=================================== Greetings, An added video's audio starts too abruptly, so I want to fade in its embedded audio track. I tried to find the 'Convert to MP3' in my V8.01, as mentioned above, but I can not find it. Is it there or not yet? I also tried the workaround but Audacity does not import AVI's. What am I missing? And, I am not sure what you mean by 'resolution of 16x8'. Is the the 'width and height'? Thanks... Gary
-
Greetings, I am creating a new project. It is just a single video that I digitized from an old VHS tape. This is an important fact since it is not HD and I have to reduce the size of the video in the O&A screen to reduce pixelization. Ok... So, I added the video. Since this is a VHS tape that I digitized, the edges of the video tend to be a bit wavy. I want to cover these edges with a black rectangle on each of the edges that show waviness. I first created the rectangles as independent objects...not as a child. It worked just fine. But then I wanted to change the size of the video by resizing it with the handles of the video in O&A. But since the rectangles were not a 'child' of the video object, they did not move with the changing of the size of the video. Then, I figured that I could copy each of the already created black rectangles to be 'child' of the video. However, when I did this, the size of each black rectangle did not retain their exact size or location and I had to reposition and resize each rectangle. So, my question is, is there a way to copy a 'non-child' object as a 'child' of an object and have it retain its exact position and size when it becomes the 'child'? The Animation figures were the same but the results of the copy are not the same size or position. It is as if was copied relative to some other object. Is there a way to keep the copied object the same size and position when going from a non-child object to a child object? Gary
-
========================== Greetings, My 2 cents is that, whether they are icons or icons with labels, the 'toast' icon and the '4 arrow' icon should be at the same location, side-by-side. To have on at one end of the screen and the other over to the right side, just makes no sense. Since they do fairly similar actions (though slightly different), put them together. I'd move the 'toast' icon to be next to the '4 arrow' icon. Gary
-
======================== Dave and Peter, Yes, I've got it now. I never used to use the Timeline. Now it is more a part of my workflow. But you have helped me to understand it more fully. I have made many suggestions to Igor but most seem to fall into the black hole. I make suggestions that I think would make the existing program more understandable and user friendly. There has been more attention to new features for the new version, which are important, but I hope Igor will now pay more attention to the 'intuitiveness' of the menus, terminology and the program in general. I might give it another try in the 'suggestion' section. Thanks for all your help. Gary
-
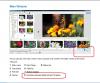
====================== Hi Dave, Hmmm...I am not sure what you are trying to correct. When trying to create a post, it is usually, at least for me, difficult to come up with the correct nomenclature to use. But your comment about 'slide list in Time View' leaves me a bit confused. The two tabs in the 'Slide List' are labeled 'Slides' and 'Timeline'. Many times, the word 'View' is added to these two terms, 'Slides View' and 'Timeline View'. So when you say 'You don't drag and drop images into the timeline...', I don't understand your point. From what I have gathered from the above postings, you can drag/drop images in the Timeline. You just have to be aware of how it differs from drag/dropping into the Slides View. You just taught me that./> One of the problems is that one of the Users Guide's pages just muddies the waters. In the attached image, it shows the #6 to be the 'Side list'. And then it also calls the 'Slides' tab as the 'Slide list' in #8. I hope Igor will now concentrate on making the program more user understandable from correcting text and labels to the Users Guide. Also, if I may ask. You add the'?' at the end of many of your sentences. I am not sure if you are actually making a statement or asking a question. Is this a 'Wales' custom or just a personal method. I enjoy your comments and they are most helpful, but sometimes I am not sure if you are leaving a question or not. Thanks... Gary />
-
===================== Dave, Lin, Peter.... Ok...I see what has be throwing me. When I drag/dropped the first image into an empty Timeline, and drop it at, say, 20 seconds, it come in at the default of 5 seconds, not 20 seconds. Only until I drag/drop the second image in does the first image's duration expand/shrink to wherever I dragged/dropped in the second image into the Timeline. Seeing that drag/dropping images as a group and all got the same default duration, it seemed like I would get the same result when I dragged/dropped images individually into an empty Timeline. Ok...I see the light. /> It is amazing what you can learn even after using this program for years!!! Thanks for sticking with me... Gary
-
========================== Peter, I completely understand that. However, it is possible to drag/drop images into the Timeline that it is empty. For example, you are starting a new show. I am just trying to point out that if you drag/drop images into an empty Timeline, one at a time, it will give different durations to each image. If you highlight the same group of images and drag them down as a group to an empty Timeline, each image will receive the default duration. This is inconsistent and unexpected. Give this a try and tell me if this makes sense. I am not talking about drag/dropping images into an existing Timeline with images already in the Timeline. When you have images already in the Timeline, I understand that you are drag/dropping them as Timepoints in the Timeline. Gary