alrobin
-
Posts
3,395 -
Joined
-
Last visited
Everything posted by alrobin
-
Stevie, If you select the option to "Create DVD folders" in VideoBuilder, the program will save a copy of the video files to your HD. Then you can make any number of DVD's by simply copying these files to them, in normal "Data" mode. There will be 7 or more such files, named "VIDEO_TS.BUP", "VIDEO_TS.IFO", "VIDEO_TS.VOB", "VTS_01_0.BUP", etc. in a folder called "VIDEO_TS", as well as an empty folder, "AUDIO_TS". Simply copy the two folders: "AUDIO_TS" and "VIDEO_TS" from your HD to the root of each DVD. This should work for most DVD players - you might want to experiment a bit to make sure, first, before burning too many copies. Where it doesn't work is where copy protection has been applied to the DVD - a feature not yet available in PTE.
-
Ken, I see that this could be a problem. Maybe Igor could arrange things so that VB will automatically assign the "Project name" to the file instead of the number "0", to save having to create a special folder for an mpeg file each time. It works OK for an "iso" file. In fact, maybe all of the files could be automatically saved in the same folder as the "DVD Video" files, and that way would all be kept together in one place.
-
Dom is right, this feature is not activated yet in v.5. Another technique, in order to avoid having to press a button to return to the menu, would be to send the viewer to a unique copy of the menu slide instead of a black slide, for each of the external shows. Then the viewer would just press on the appropriate button, on return to that menu copy, to go to the next show, without having to be directed back to the front of the introduction show.
-
Ken, I find that if I give the project a new name each time (top line on the 3rd screen of VB), the program automatically creates a folder by that name and saves the video files to it. The default name is "Untitled" but you can change it. No need to create a new folder first.
-
This is true. The image objects have to be pre-sized before importing into the Obj Editor. Are you synchronizing any of the shows to the music? If not, then you can customize one of the black slides to "Play background music", but do not add any music to it. This will cut off any background music already playing. If you are synching the shows, you probably aren't synching the intro show. In this case, arrange the intro slide to play music from the "Customize slide" menu instead of from "Proj. Ops". Then program the buttons to go to a black slide instead of to the next show, choose "Play background music" for this black slide in "Customize slide" (but do not select any music), and then program this slide start up the desired show (Customize slide / Main / Run external application). You will have to have a different black slide for each show you want to run from your menu show. You will also want to program one of the mouse buttons (preferably the right one as you will be using the left one to click on the buttons) to "go to the first slide" so you can get back to the menu after each show. You might have to experiment a bit with this until you find a combination that works for you in your particular setup. Use blackslides and the abrupt transition won't be noticed. Hope this helps some!
-
Jean, It's just as it says - "Create a DVD disc" is used if you want to use PTE's "Video Builder" to burn an slideshow to a DVD - it also will save the DVD files onto your HD, or create an MPEG file of your show, if you wish. "Create AVI file" is used if you want to create an AVI file for use in burning a DVD in some other video-editing software, such as Nero, Pinnacle, etc. You would use this option if Video Builder does not work for you or if you want to use some other program's menu-editing capabilities. Note that you can also use Video Builder to combine your PTE show with other video AVI files.
-
Bob, Welcome to the Forum! You can edit or delete a post if you want, using the buttons below, after you have posted it.
-
Bill, I wouldn't use it, myself, as I have no problem logging in to Beechbrook itself whenever I want to check for updates, but I can see where it could be useful to some. I usually wait for notification on the forum about a new show, and then pick up any new ones not so mentioned along with the one in the notification.
-
Kenn, Welcome to the Forum! Further to Dom's reply, if you are using version 4.48 you can arrange your show so that it can be paused (either by the nav bar, as Dom has mentioned) or by "programming" the mouse buttons (in Proj. Options) so that one of the buttons toggles the pause on and off. If you are synching to music, you must also check "Permit the control of show" in order for either of the above methods to work.
-
Bob, it depends on your own particular situation. If you have a show where each slide has only the main image, and not any objects, then Barry's method will work. However, if you are starting a show, and plan to add several objects to each slide, then you can set the "cover slide" option as you go along, and Barry's method is not required. In this case you would probably want to select which objects you apply the "cover slide" option to separately, anyway, slide-by-slide. I don't know offhand all the situations for which the method will work, and for which ones it won't work. I just know that for the example I tried it on (Igor's "water-skimming" demo), it didn't work.
-
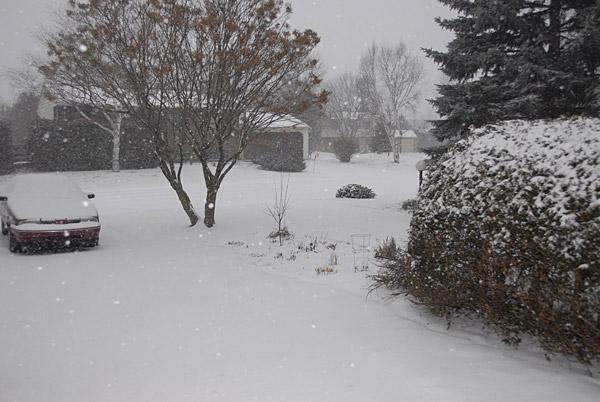
Lin, Sorry to hear that! I've often wondered how long my own eyes would hold out after staring at the screen for so many hours. Maybe everyone had better take a break and rest up. Hope you recover real soon! By the way, your snow demo worked! (see attached image). Thanks so much! Will be getting the skis back out tomorrow!
-
Sorry, I was off on a bit of a tangent with my reply - I was referring to the option "Put to center" which you will find in the menu window if you right-click on an object. Dom more-correctly answered your specific question about the "center" text box in O&A. As he indicated, this allows you to type in a value and move the centre of an object so that it will rotate around a different point. If the object is highlighted, you can also grab the centre point with the mouse and move it to where you want it. Then, if you wish, you can select "put to center" to restore it back to the centre of the object.
-
Ron, I think you may be correct, but I still prefer to keep things separate - I have a separate folder for each of the betas just so I know exactly where things are, and can compare the dates for each version, and be able to tell which files were changed in each version, too. Handy for beta-testing!
-
Barry, This is indeed a clever workaround. Just one catch, though - it doesn't always work (e.g. if you have two objects on each slide, set the top object on the first slide to "cover slide", and then use the arrow to select the mode on the second slide, the bottom object will be changed instead of the top one.)
-
Ragnar, The "center" function is used to centre an object over the underlying image or other object. Useful if you have been dragging and dropping an object, and then want a quick way to re-centre it. Re the blanks, who knows what new goodies Igor has in store for us??
-
Hi, Carol, Welcome to the Forum! This is the way I do it (you can just install it into the existing folder, but I prefer to keep the different versions separate). I make a copy of the present PicturesToExe folder (or make a new folder and copy all the existing files to it). Download the new "beta" version into the new folder (it will be a "zip" file). Unzip it and drag (or copy) the 5 files over to the new folder, replacing the 5 similar files that are there from the previous version. Find the "setup" file and double-click on it. Follow instructions, and you should have a new icon on your desktop which you can use for version 5, in addition to the one for version 4. Please don't hesitate to come back for more help if something doesn't work for you.
-
Maureen, Wouldn't Ragnar's suggestion still provide you with the information you need (he is suggesting that the duration time be displayed without having to press the button.)
-
Glenys, One method would be to combine the PTE show with the ".avi" file for the other video, and burn the resulting video to a DVD. You should be able to use the new "Video Builder" packaged as part of PTE v.5 beta 8 to do this. If not, then create an "avi" file for your show with PTE and combine it with the other video in a program such as Nero or Pinnacle or Premiere Elements, etc.
-

On Video Text Effects - Some Tips and Examples
alrobin replied to Lin Evans's topic in General Discussion
Hi, Lin, Thanks for the example - I can see I'm going to like this program! Did you convert the animated GIF directly to separate images for PTE or did you go the "video" route first, and then pick the images off at 25 fps, or some similar rate? It shouldn't be too difficult to separate the graphic from the background in order to superimpose it onto a different one in PTE. -
Peter, Glad you got it sorted out. By the way, how many images are you showing in your sequence? It seems like a very large file, and could probably be cut back by using smaller images. Also, what type of music are you using? "Wave" files are much larger than "mp3" files, and don't really add much in the way of quality.
-
Peter, I still see the usual icon for each of my PTE executible files, not only pre-4.48, but also for v.4.48 and v.5. Must have something to do with your Windows setup.

-
Bob, Great fun! The "Old fun" is still the best - but I felt my back crunch on some of those bumps! By the way, what was all that white stuff on the ground?
-
Ray, Good to have you back here! Sorry that it's partly because of such disappointing circumstances. By the way, from summer 05 to now is only 1 1/2 years, so the delay isn't quite as long as you indicated! I suspect that most of the bugs are out of the new PZR features, and any sequences developed now should be compatible with the final release (with only a few adjustments necessary), so if I were you I would go ahead and start preparing the images, sound and graphics now, and add in the features not yet available later on (e.g. comments, nav bar, object actions, sync fine-tuning etc.). Of course, "once bitten, twice shy", so I can understand your reluctance to do any significant development work before the final release. Best of luck!
-
There are some issues with timing on the timeline in v.5. Not all of the sync features are working yet in v.5. Try extending the music selection with a couple seconds of silence, so it doesn't cut out too quickly, and adjusting the position of the last slide until the show will cut off before restarting. Preview it in the main preview instead of on the timeline, as there is a slight difference in the timing between the two. I don't know if this feature is activated yet, but also try unchecking "Repeat music after playing" in Proj Ops / Music. Hope this helps.
-
On Video Text Effects - Some Tips and Examples
alrobin replied to Lin Evans's topic in General Discussion
Azmi, Thanks for the info on XARA - that's the type of program I have been looking for, for fancy 3D text. Looks like a good program - the images seem to be very smooth, and it will also handle simple graphics as well as text.