

davegee
-
Posts
9,334 -
Joined
-
Days Won
59
Everything posted by davegee
-

des transitions dans PTE AV Studio 11 ne fonctionnent plus [SOLVED]
davegee replied to nicky68's topic in Troubleshooting
This is an English language Forum. Please use Google Translate. DG -
Large pixel images CAN cause problems in an EXE depending on the hardware used to SHOW the EXE wheras an mp4 from the same project will not display the same symptoms. In such cases, large pixel size images are the usual suspect. You will need to make the EXE available to Igor for him to provide a definitive answer. DG
-
Dan, There are various screen grab softwares available. I use the screen grab feature available in GeForce Experience (free) which compliments my nVidia Graphics card and gives excellent results. The resulting mp4 can be played standalone or re-introduced into PTE for further refinement. DG
-
More information needed. Your system, graphics card, memory etc? What size in pixels is the image which falters. Can you cut it down to screen resolution and try that? DG
-
Only available in Pro version. Compare Editions: https://www.wnsoft.com/en/pte-av-studio/compare/ This Style will do something close to what you wanted: Text Template BLC.ptestyle DG P.S. You will find the Imported Style in DaveGee Styles
-
Text Template - file title across each slide
davegee replied to Tony Harding's topic in General Discussion
-
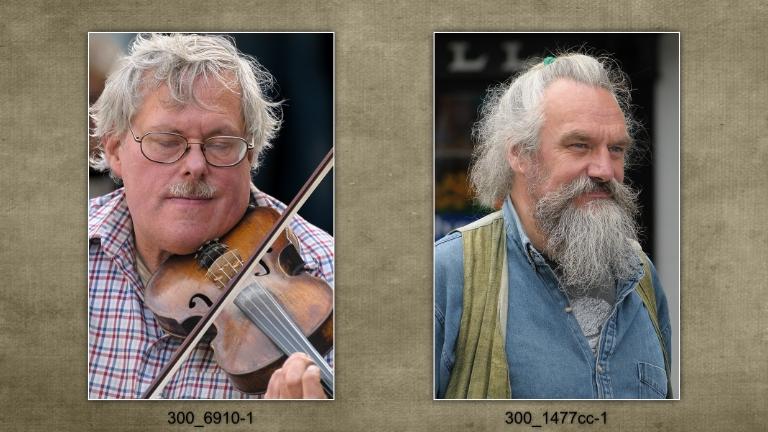
A simple Style for two upright images with a Text Template. 2 Upright with text.ptestyle DG
-
Text Template - file title across each slide
davegee replied to Tony Harding's topic in General Discussion
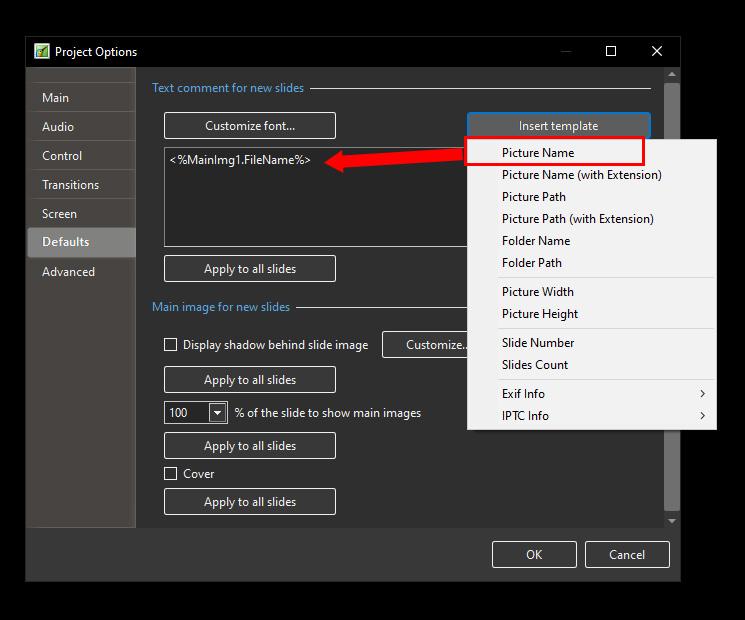
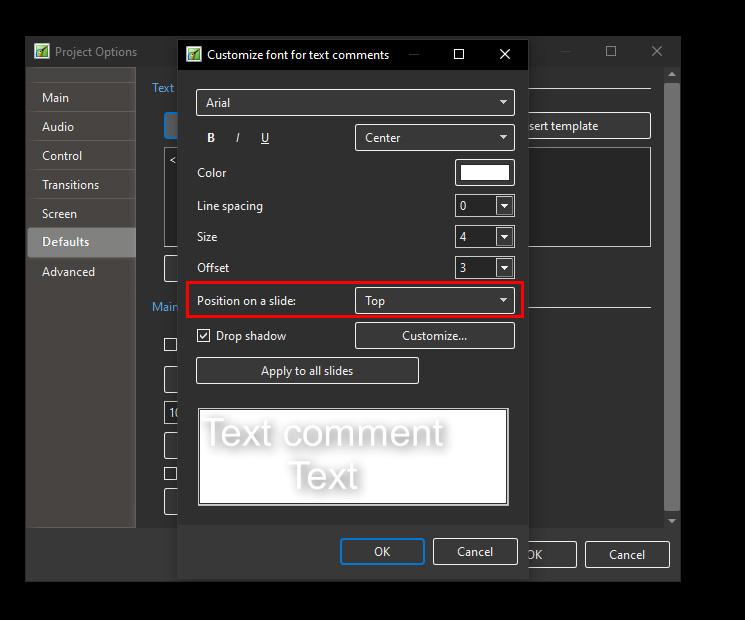
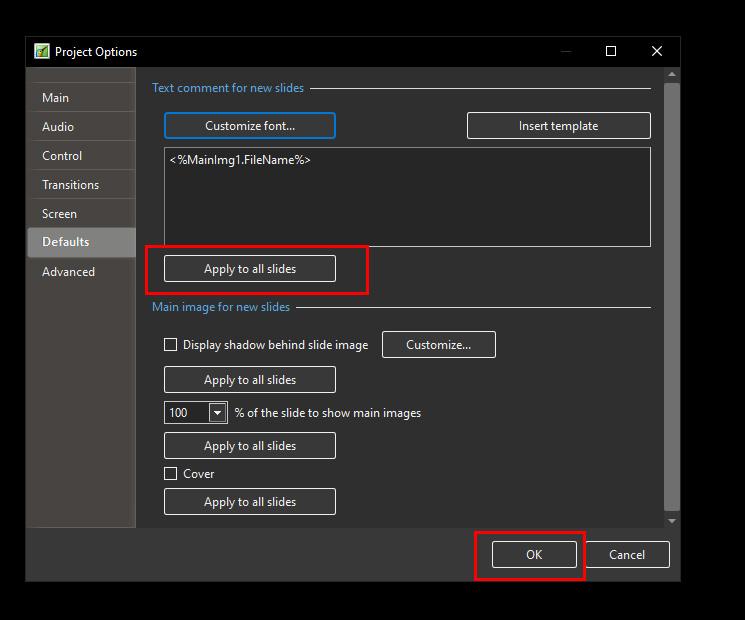
Use Project Options/Defaults. Insert Template then Customise Font and Apply to all Slides. DG -
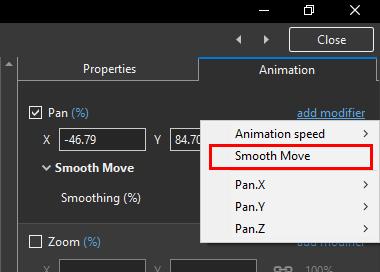
Hi Dave, I am unsure what you are trying to achieve. Smooth Move is best suited to a Pan with both Pan X and Pan Y. Your project appears to only have Pan X. Can you post a simple one slide project in a Backup In Zip so that someone can analyse what you are doing? I have tried a simple pan with an intermediate KF set to Smooth Move and cannot replicate what you have posted (Windows). DG
-
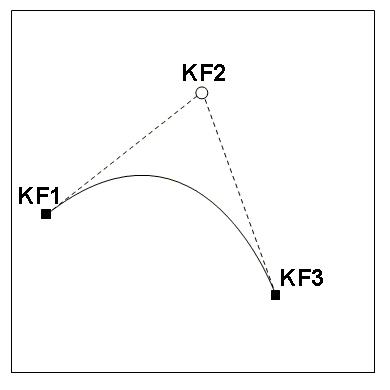
Smooth Move requires three or more KF and the Smooth Move is applied to the Intermediate KF. See: https://www.pteavstudio.com/forums/topic/36388-smooth-move/ DG
-
Try Ctrl+Click and Drag on the slide that you want to move. The Cursor should remain in place during the move. DG
-
Do you mean "the CURSOR jumps to the slide I clicked"? DG
-
In "Basic" Styles there is a Style called "No Style". Apply that. DG
-
The latest version 9 is 9.0.22. See Help / About. If you are not running this version I suggest that you download and install from here: https://www.wnsoft.com/en/pte-av-studio/old-versions/ DG
- 1 reply
-
- 1
-

-
If you produce .exe files you can upload to Slideshowclub. See the link at the top of this page. If you produce mp4 filesyou can upload to Youtube or Vimeo and add a link to a post here. DG
-
Open the project and use "Create a backup in Zip" (File Menu). Move that to the new computer and extract it. DG
- 1 reply
-
- 1
-

-
Smooth Move is an animation Modifier which was introduced with Version 11 of PTE AV Studio. It is necessary to have at least 3 keyframes and apply this modifier to the middle keyframe(s). The amount of Smoothing is adjustable by using the "Smoothing %" slider. It is available only in the Pro Version. It simulates movement of an Object along a Bezier Curve and Smooths an otherwise sudden change of direction of the object. Examine the following example: Smooth Move_Apr26-2023_10-08-56.zip DG
-
- 3
-
-
https://docs.pteavstudio.com/en-us/11.0/how_to_v11/add_text#font_size DG
-
Try a different piece of music first? DG
-
Overview of updates here: https://jkost.com/blog/2023/04/denoise-and-masking-updates-in-adobe-camera-raw-v15-3.html Video tutorial her:
-
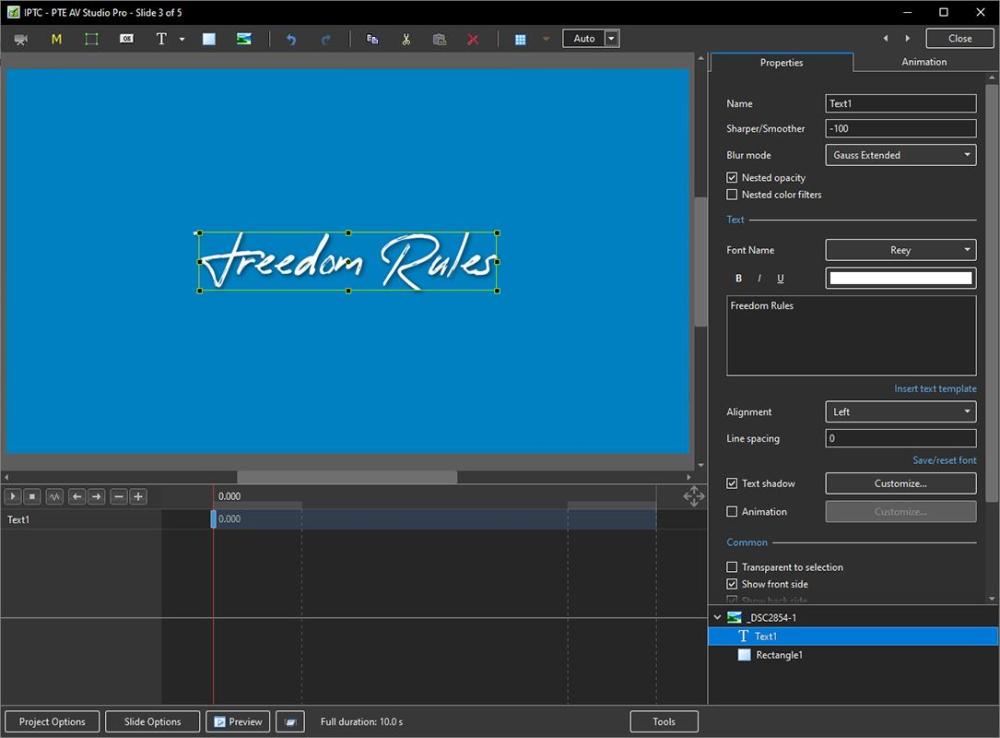
Hi Igor, The Reey Font now works OK. Thanks, DG
-
Done. DG
-
Igor, It is the same in Version 11 latest. This Font is Reey (otf). DG
-
Yes Mark, I was able to download "HEIC to Jpeg" converter in a similar way, but that does not give me access to the extension that I am looking for to be able to VIEW HEIC files. As I said above, I have completed the task but would like to obtain the Windows Extension for viewing HEIC files for future use. The freezing of the site when following the Windows Links has been documented by other users in various forums. DG
-
Hello Denis, This is a copy of my system Windows Spec. I think that probably you have installed "something" which allows you to see and edit HEIC files. Edition Windows 10 Home Version 22H2 Installed on 05/12/2020 OS build 19045.2846 Experience Windows Feature Experience Pack 120.2212.4190.0 DG
