davegee
-
Posts
9,295 -
Joined
-
Days Won
56
Everything posted by davegee
-
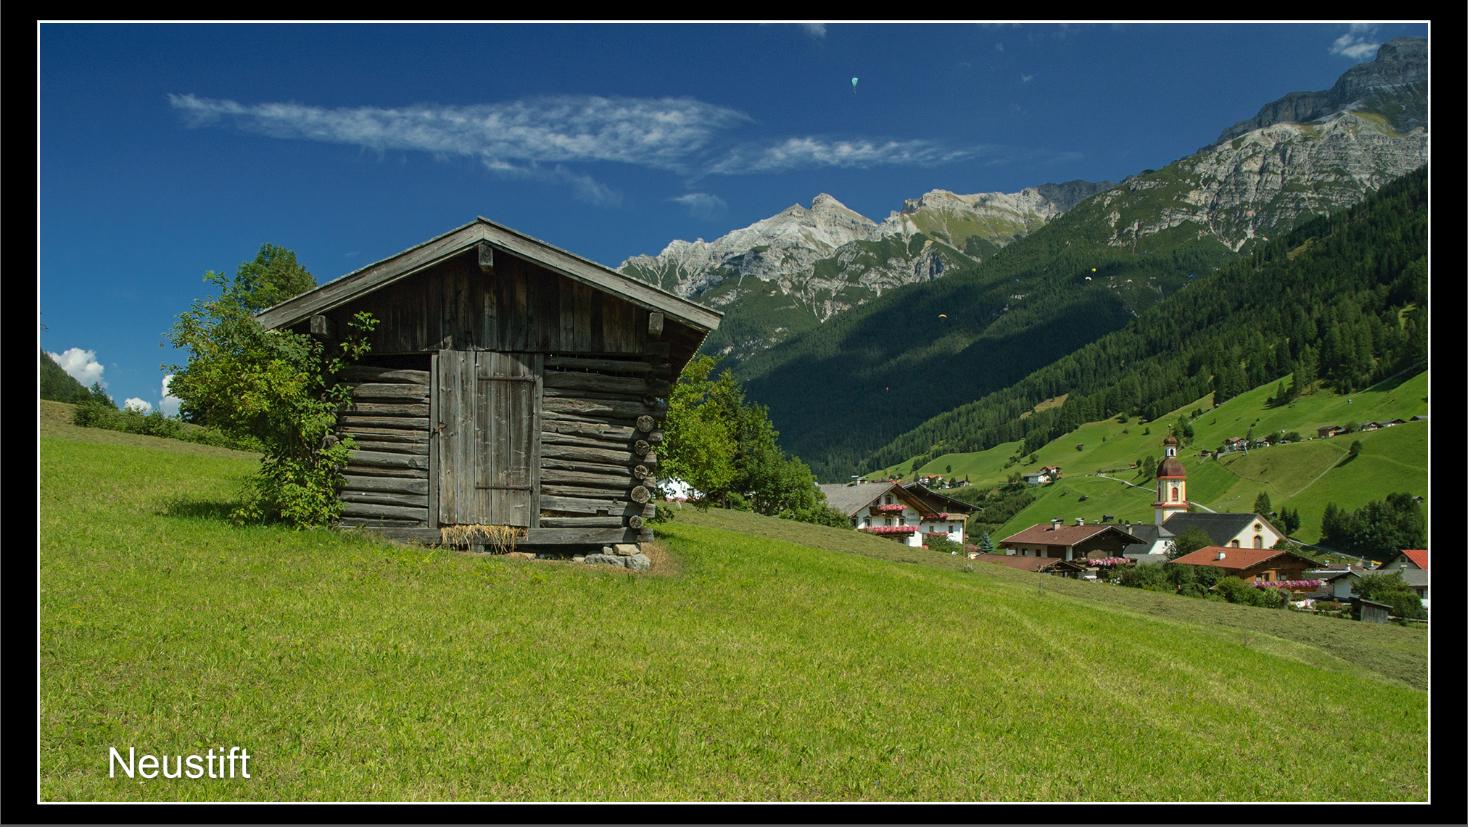
Here is my interpretation of your original post image with shadow etc. Five images - Image 5 is BG. Style will appear in TEMPORARY Category. POSTCARD2.ptestyle DG
-
Here is my prototype 1. Images 1 to 4 are anti clockwise. Style appears in Temporary Category. I have not yet added the BG image - maybe tomorrow. POSTCARD.ptestyle DG
-
It is fairly easily do-able in PTE but I think that I would probably create all of the masks and borders in Photoshop. DG
-
It also happens with PS CC / latest version. Changing the "Q" to lower case solves it (but that is not the answer). Also, it only is a problem with JPEG. NEF files and PNG are not affected. Strangely, Quit-001.jpg opens without problem. DG NB Ctrl+Q is the Keystroke for Quit in PS.
-
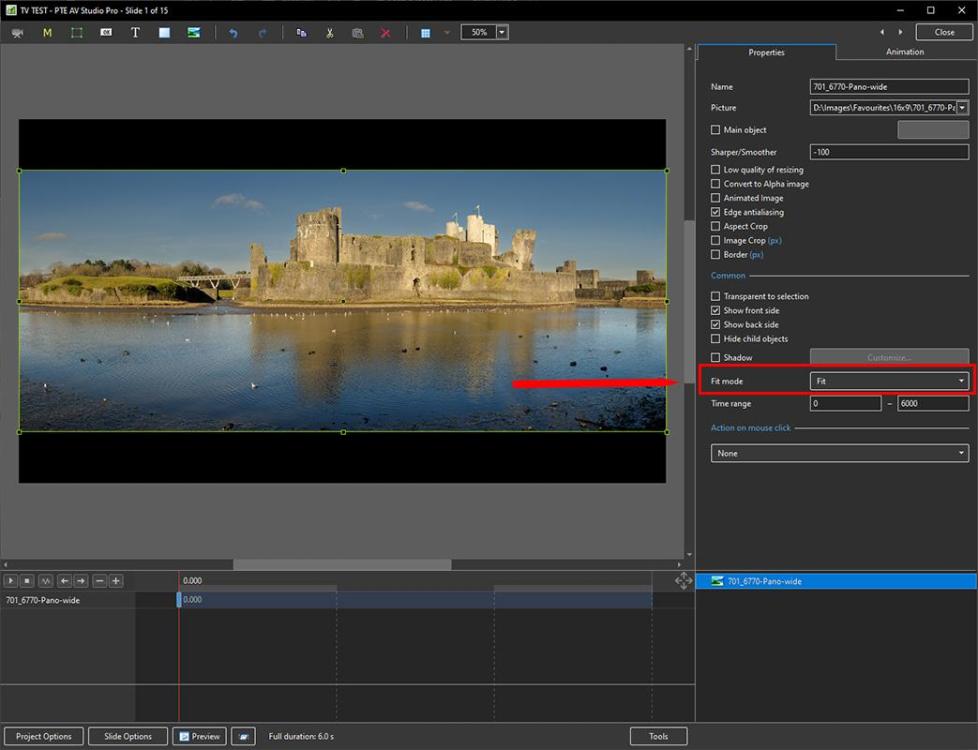
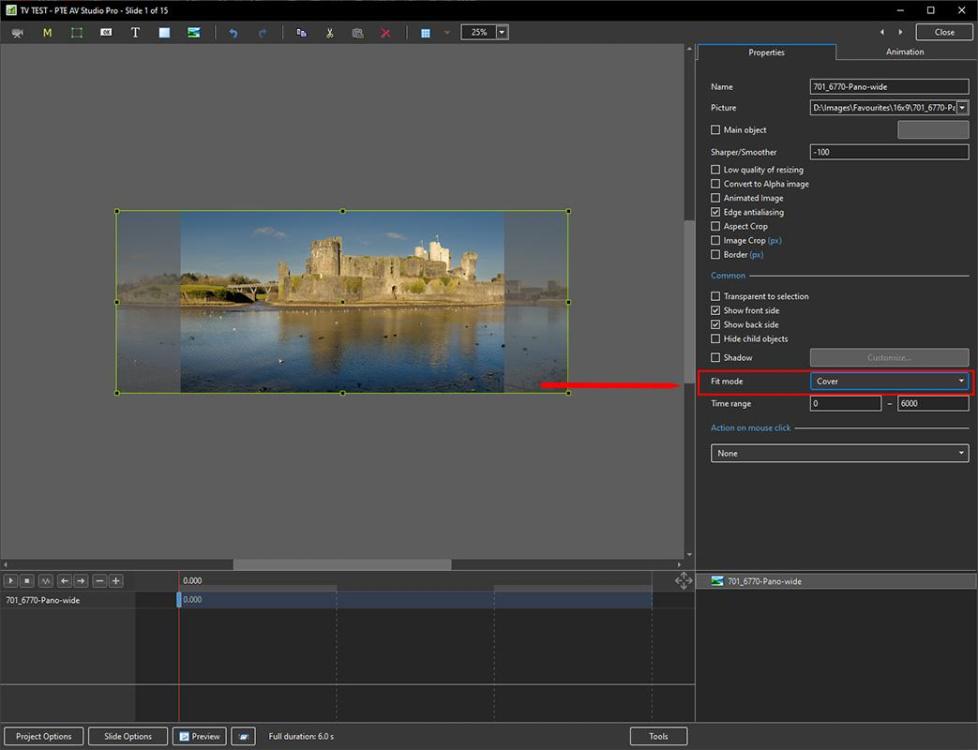
Igor has provided FIT and COVER Styles in the IMAGE Category. Make a selection of those slides that you want to be in Cover Mode and apply the COVER Style. N.B. This needs to be done FIRST - before any other animations. DG
-
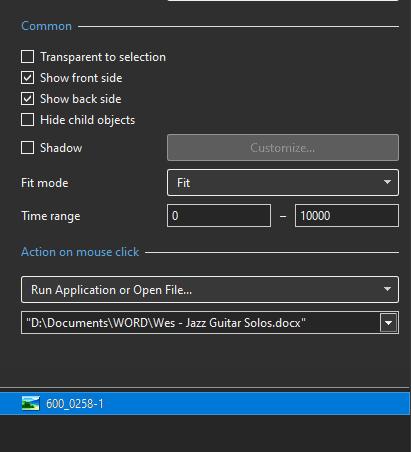
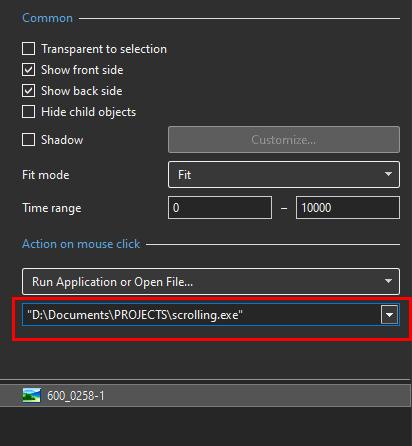
 Google is your best friend - found this: (Windows 10) Hold shift key and right click on a folder. Choose "Copy as Path". Paste into the Action on Mouse Click box. Works. DG P.S. Or just type in the Path e.g. "D:\Images\Favourites" with quotes
 -
Yes Denis, but the file is not selectable - the shortcut is. The shortcut has to exist. DG P.S. I did not have "All Files" selected. Maybe with "All Files" selected I could go straight to the file. P.P.S Yes with "All Files" selected you can go straight to the File. However, for whatever reason, Peter asked specifically about shortcuts.
-
After a little experimentation I created a shortcut to a WORD doc and was able to select it in Action on Mouse Click. DG

-
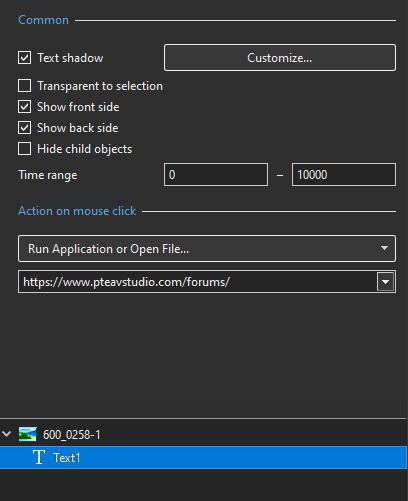
Hi Peter, Nice to hear from you again. I just noticed that you are using a beta of V10 - try the latest V 10.5.7 - it is a free upgrade. https://www.wnsoft.com/en/pte-av-studio/download/ Have you saved the "workbench" in the latest version?? Just to echo what Bruno said, click on the dropdown and Browser opens - choose your application. I managed to open the WNSOFT forums web site with a full shortcut i.e https://www.pteavstudio.com/forums/
-
Based on your requirements: 95% with Text Box justified left. You can adjust Zoom %, Border (Stroke Line) px, all of the Text attributes (if I knew what font you were using....) Mask Frame.ptestyle DG

-
That would be too easy! DG
-
Try this with a 2x3 portrait image Mask Frame 2x3.ptestyleMask Frame 2x3.ptestyle
-
This Style solves the renaming problem. Mask Frame.ptestyle Regarding the Portrait format version - is the AR variable or fixed? E.g. is constant 2:3 or will that vary? DG
-
You can make your own Style based on this one after making any adjustments. You can also add the ability to add a Text Box and enter your Text when applying the Style. Can you elaborate a little on the renaming of Slides. If you have already renamed a Slide it is a similar problem to the adjustments problem you mentioned. Nothing we can do about that. DG
-
Hi Gary, While you are waiting try this Style, which is an example of what you can achieve now if you really want to rotate an image within a frame. The Imported Style will appear in your Temporary Folder. It gives you the ability to rotate your image and also has a blurred BG which you may or may not want. It also has a shadow which you may or may not want. The Stroke Line Width, Zoom, Rotation, Shadow and Blur are all adjustable. Mask Frame.ptestyle DG
-
If you have a PRO License, you can use the ENVELOPE to increase the Volume. In Settings / Preferences / Timeline you can set the Audio Track Height. Click on the dropdown menu and drag the slider to the right. https://docs.pteavstudio.com/en-us/10.0/project_settings_1/preferences#timeline https://docs.pteavstudio.com/en-us/10.0/main-window_1/audio_files?s[]=envelope#the_envelope DG
-
By setting -100 (%) for the Centre of the Text Box you are moving its Centre to the Left Edge of the Box. The Text will then "expand" from the left. Similarly, by setting Centre x at 100 (%) you are moving its Centre to the Right Edge of the Box. The Text will then "expand" from the right. Bruno explains it, albeit in French. DG
-
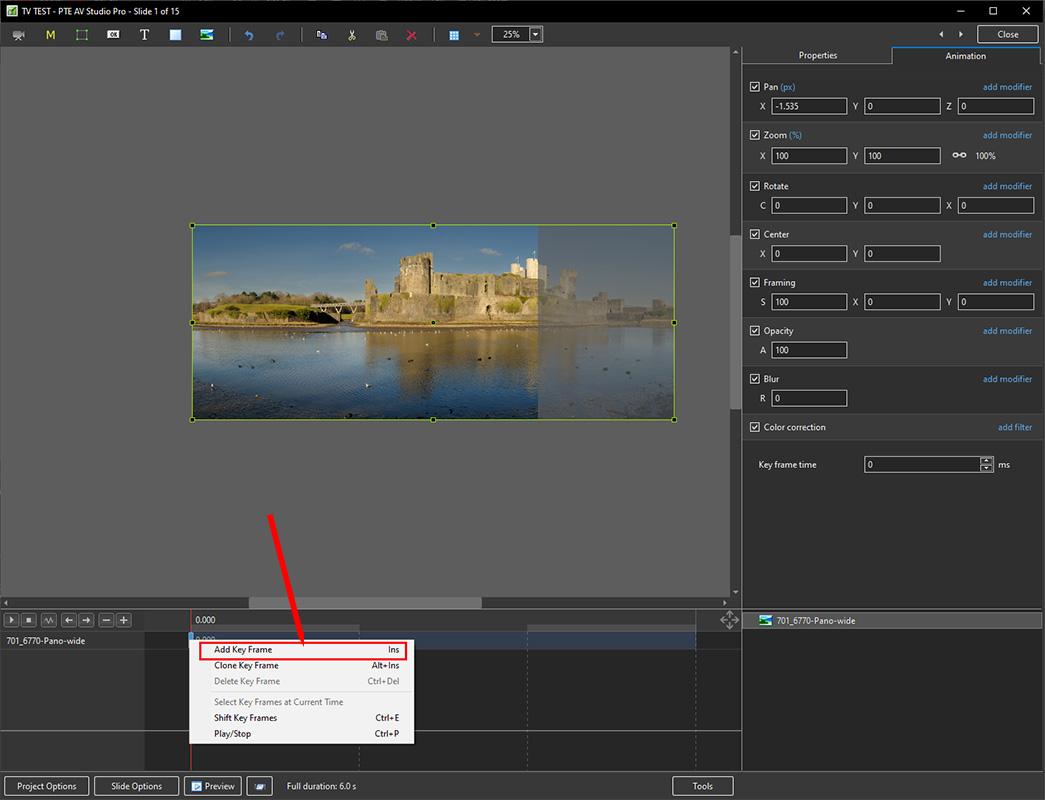
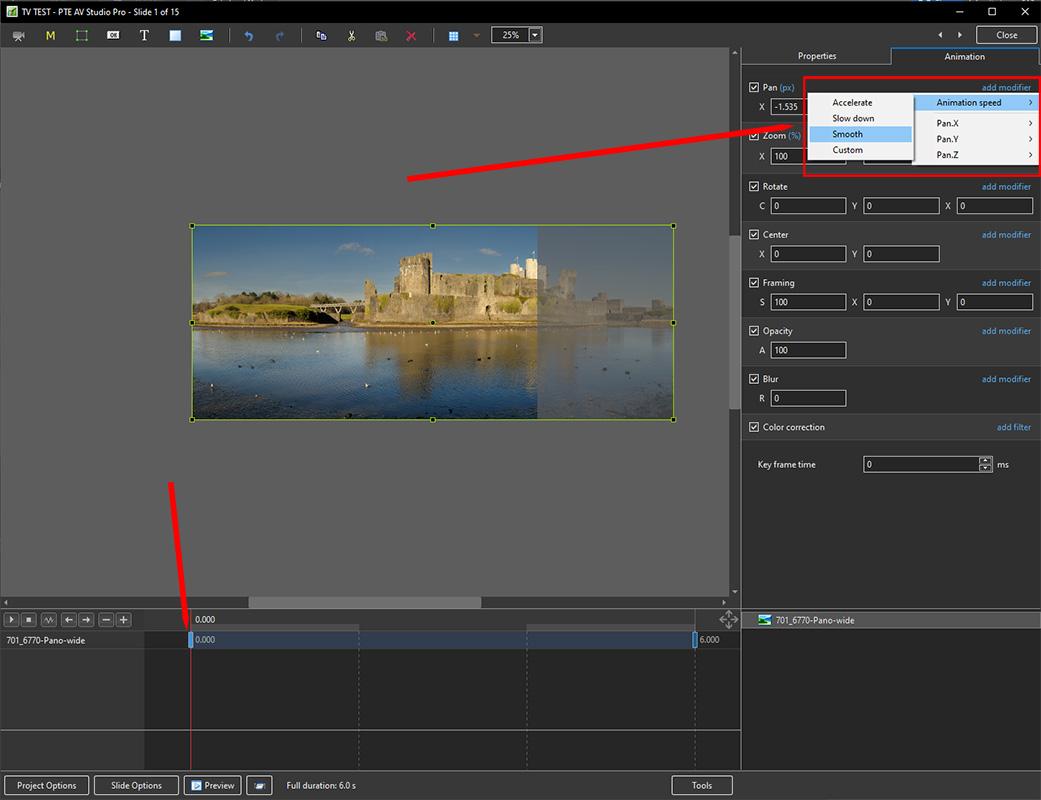
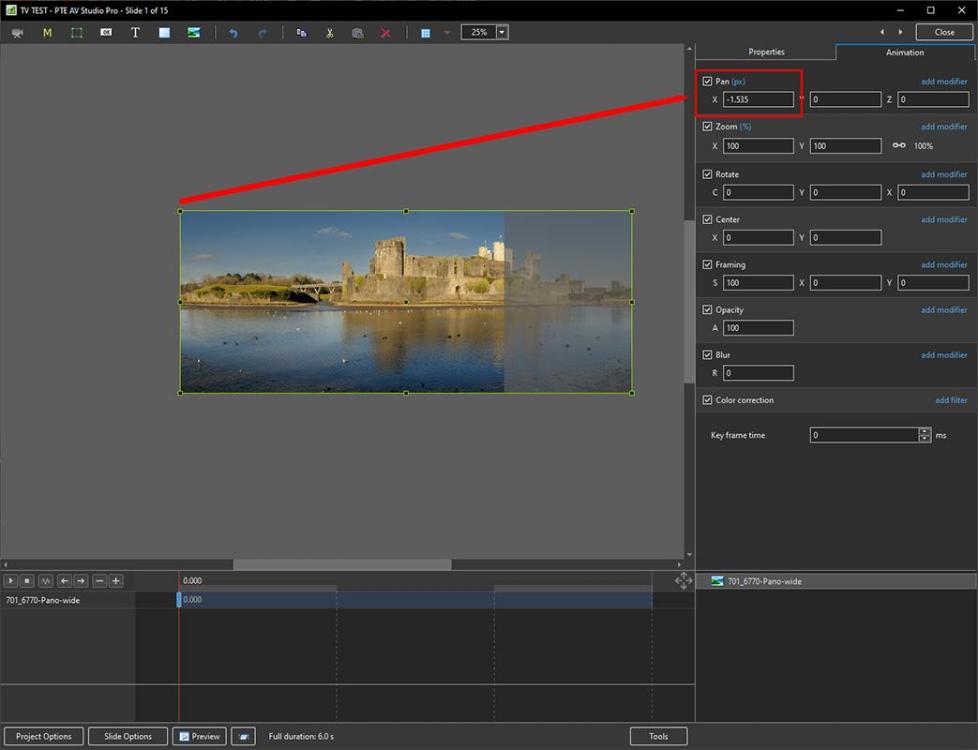
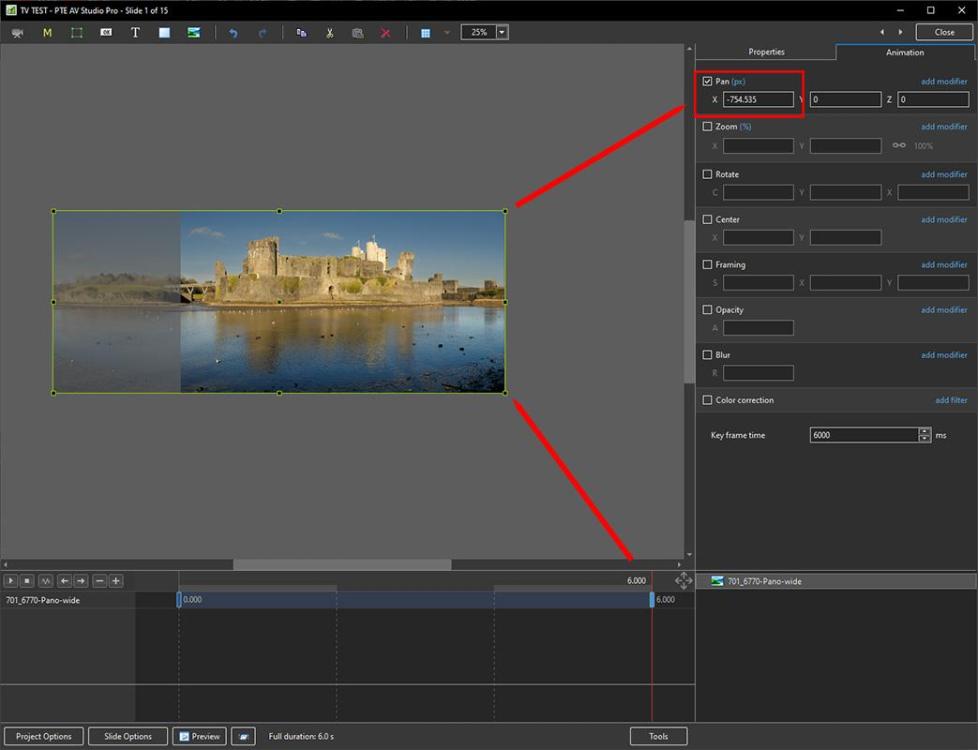
Add your image to the Slide List and click on Objects and Animation In the Properties Tab set the Fit Mode to COVER. In the first KEY FRAME (KF) adjust the PAN X control in the ANIMATION TAB until the image sits correctly on the left of the screen Right click on the First KF and ADD a new KF - it will appear at the end of the Timeline. Click on it Adjust the PAN X control until the Image sits correctly on the right of the screen. Click on the first KF again. Click on "ADD MODIFIER" in the Pan section and then on ANIMATION SPEED - set SMOOTH. PLAY. DG


-
Options and Animation error after changing image
davegee replied to Tim Harvey's topic in Troubleshooting
Just tried your "problem" procedure and did not get the same result as you. Try downloading and installing the latest version from here: https://www.wnsoft.com/en/pte-av-studio/download/ Alternatively, try going into O&A first and changing the image via the Properties / PICTURE dropdown menu. DG P.S. Have you tried this procedure with a different project? -
Does this help? https://www.pteavstudio.com/forums/topic/21413-dual-monitor-slideshow-switching-and-windows-shortcuts/#comment-141339 DG
-
Please try this: https://docs.pteavstudio.com/en-us/10.0/video/main#chroma_key
-
Thanks Jill, I have never had the need or desire to explore this feature so I left it to Lin. I seem to remember that his article was a lot more "wordy" than yours, but that was Lin. Or was the procedure perhaps more involved in Version 8? DG
-
If you feel that you have a pressing need to apply "Chroma Key" principles to a JPEG you could create a short mp4 (in PTE) from the jpeg complete with animation and apply the Chroma Key effect to the resulting MP4. DG
-
Lin's article on Chroma Key was a Version 8 "How To". If you search for "Chroma", you will find a broken link to it. I will delete that broken link. Version 8 is no longer supported and all of the "How To" articles were deleted some time ago, most having been updated to Version 9 or Version 10. Perhaps someone here saved it as a PDF? If anyone who uses it would like to write an updated version of "Chroma Key" in Version 10 it could easily be added to the OH. DG
-
Settings / Preferences / System / Double Click........... https://docs.pteavstudio.com/en-us/10.0/project_settings_1/preferences#system DG